 1989–2000L318L318Engine not documented for this generationEngine not documentedSee faults & what to checkPhoto: Vauxford via Wikimedia Commons, CC BY-SA 4.0.
Land Rover2004–2016 Critical issues documented
Land Rover LR4: common faults & what to check
Thinking about buying a used Land Rover LR4 (2004–2016) in New Zealand? We've documented 10 known faults for this model spanning engine, body & rust, suspension, and transmission. Each researched and verified before it's published. The most serious issues here are rated critical. Every one is listed below with its symptoms and repair cost, and each has its own page with where to look and what to ask the seller. Free, no account needed.
Check this exact Land Rover LR4
- Odometer history
- Money owing
- Reported stolen
- Ownership history
10
Critical
$2,500–$7,000
5
Which Land Rover LR4 are you looking at?
Engine not documented
1989–2000L318L318Engine not documented for this generationEngine not documentedSee faults & what to checkPhoto: Vauxford via Wikimedia Commons, CC BY-SA 4.0.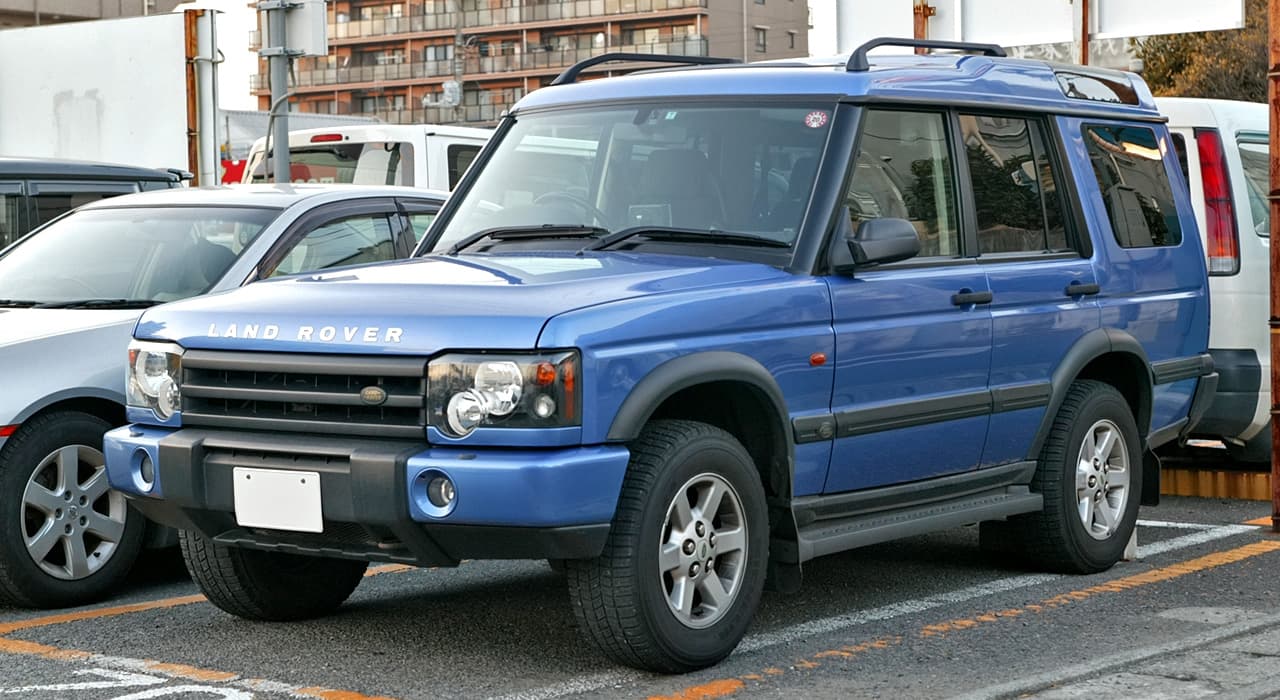 2000–2005D2D2Engine not documented for this generationEngine not documentedSee faults & what to checkPhoto: Tennen-Gas via Wikimedia Commons, CC BY-SA 3.0.
 2005–2017D3D3Engine not documented for this generationEngine not documentedSee faults & what to checkKickTyres illustration, not a photograph.
 2017–nowD5D5Engine not documented for this generationEngine not documentedSee faults & what to checkKickTyres illustration, not a photograph.
Start your free check on this Land Rover LR4
Land Rover LR4
Can't confirm for this car
Land Rover LR4
Nothing has been narrowed yet, so nothing below is a claim about a particular car. Pick a year and an engine to see which faults apply.
Tell us the engine, or check the engine code on the car, before relying on this.
matched on no vehicle context
What to look out for
Serious issue
This is the single most important pre-purchase check for any TDV6 Discovery 3 or 4.
TDV6 2.7 Oil Cooler Seal Failure and Oil-Into-Coolant Contamination
The 2.7 TDV6 engine (Discovery 3 and 4, also Range Rover Sport TDV6) is widely regarded as the single most costly common failure in the Land Rover Discovery 3/4 ownership experience. The oil cooler is integrated into the engine block adjacent to the coolant passages. The internal seals between the oil and coolant circuits degrade and fail, allowing engine oil to enter the coolant system. The result is a thick, sludgy emulsion that blocks the small coolant passages, causing overheating, and if not caught early, warped heads, cracked liners, or complete engine failure. Repair requires engine removal and full oil cooler rebuild. The fault is so consistently documented across UK, AU, NZ, and SA markets that it is covered in virtually every TDV6 buyer's guide ever written.
What you would notice
Serious issue
Cold-start the engine and listen carefully for a metallic rattle from the top before oil pressure builds.
TDV6 2.7 Secondary Timing Chain Wear – Chain Between Camshafts
The Ford-PSA TDV6 2.7-litre diesel fitted to Discovery 3 and 4 uses multiple timing chains. The secondary chains that run between the two camshafts on each bank wear significantly faster than the primary drive chain. Stretched secondary chains allow cam timing to drift, causing rough running, power loss, and fault codes. If ignored, a chain can jump a tooth or snap, bending valves and causing catastrophic engine damage. The failure is extensively documented and repair requires significant disassembly. Any vehicle over 120,000 km without documented chain replacement is high-risk.
What you would notice
Serious issue
Remove sump and inspect oil pump drive sprocket for cracked or stripped teeth.
TDV6 2.7 Oil Pump Drive Sprocket Failure
The 276DT 2.7 TDV6 engine uses a plastic-toothed sprocket to drive the oil pump off the crankshaft. The sprocket teeth strip or the sprocket body fractures under thermal cycling and chain load, immediately stopping oil pump drive. Oil pressure drops to zero within seconds and the engine suffers catastrophic bearing and bore damage before the oil pressure warning lamp can prompt driver response. The failure is most common between 80,000 and 150,000 km but can occur earlier with poor oil change intervals.
What you would notice
Serious issue
Probe suspected areas with an awl.
Front Differential Mounting Crossmember Corrosion Perforation
The front differential and lower wishbone rear pick-up points are carried by a fabricated steel crossmember that forms part of the forward chassis structure. The crossmember is box-section steel and traps road contamination and moisture at welded seams. Internal corrosion progresses unseen until the section walls perforate. In advanced cases the differential mounting captive nuts pull through the corroded metal and the front differential shifts under load. This is a structural failure with implications for front geometry, crashworthiness, and WoF/MoT compliance.
What you would notice
Serious issue
Inspect dust boot condition visually.
Front Lower Wishbone Ball Joint Wear and Failure
The front lower wishbone ball joints on the Discovery 3 and 4 are loaded heavily by the vehicle's considerable kerb weight and off-road use. The ball joint dust boot splits readily when contacted by terrain, allowing water and grit to enter and rapidly accelerate wear of the ball and socket. Worn joints develop measurable axial and radial play. Unlike some designs, the ball joint is integral to the wishbone arm on some variants requiring full arm replacement. Advanced wear can result in sudden joint separation causing complete loss of front wheel control.
What you would notice
Costly issue
Park the vehicle on flat ground overnight and check it in the morning - a corner that sags overnight indicates a leaking air spring or valve.
Air Suspension Corner Failure - Height Sensor, Air Spring, and Compressor
The Discovery 3 and 4 (LR3/LR4) use a full air suspension system with corner-specific height sensors, air springs, a compressor, and a valve block. All four corners are independently susceptible to failure. Height sensors develop corrosion and fault at the wiring connector causing the vehicle to incorrectly control ride height. Air springs perish and split (particularly rear springs on high-mileage vehicles). The compressor wears out and the valve block develops leaks. These failures are so prevalent that multiple aftermarket air-to-coil conversion kits exist specifically for this generation. The fault pattern is documented across every major Land Rover owner forum in AU and NZ.
What you would notice
See all 10 documented issues
Depends on which engine this Land Rover LR4 has — 10
Engine, transmission & cooling
01TDV6 2.7 Oil Pump Drive Sprocket Failure
Can't confirm for this car
CommonEngine $2,500–$25,000 to fix
Can't confirm for this car
The 276DT 2.7 TDV6 engine uses a plastic-toothed sprocket to drive the oil pump off the crankshaft. The sprocket teeth strip or the sprocket body fractures under thermal cycling and chain load, immediately stopping oil pump drive. Oil pressure drops to zero within seconds and the engine suffers catastrophic bearing and bore damage before the oil pressure warning lamp can prompt driver response. The failure is most common between 80,000 and 150,000 km but can occur earlier with poor oil change intervals.
Symptoms to notice
What to check
Ask the seller
02TDV6 2.7 Oil Cooler Seal Failure and Oil-Into-Coolant Contamination
Can't confirm for this car
Very commonEngine $4,500–$9,000 to fix
Can't confirm for this car
The 2.7 TDV6 engine (Discovery 3 and 4, also Range Rover Sport TDV6) is widely regarded as the single most costly common failure in the Land Rover Discovery 3/4 ownership experience. The oil cooler is integrated into the engine block adjacent to the coolant passages. The internal seals between the oil and coolant circuits degrade and fail, allowing engine oil to enter the coolant system. The result is a thick, sludgy emulsion that blocks the small coolant passages, causing overheating, and if not caught early, warped heads, cracked liners, or complete engine failure. Repair requires engine removal and full oil cooler rebuild. The fault is so consistently documented across UK, AU, NZ, and SA markets that it is covered in virtually every TDV6 buyer's guide ever written.
Symptoms to notice
What to check
Ask the seller
03TDV6 2.7 Secondary Timing Chain Wear – Chain Between Camshafts
Can't confirm for this car
Very commonEngine $4,000–$8,500 to fix
Can't confirm for this car
The Ford-PSA TDV6 2.7-litre diesel fitted to Discovery 3 and 4 uses multiple timing chains. The secondary chains that run between the two camshafts on each bank wear significantly faster than the primary drive chain. Stretched secondary chains allow cam timing to drift, causing rough running, power loss, and fault codes. If ignored, a chain can jump a tooth or snap, bending valves and causing catastrophic engine damage. The failure is extensively documented and repair requires significant disassembly. Any vehicle over 120,000 km without documented chain replacement is high-risk.
 Example of the part — not this vehicle
The front of a twin-cam engine with the timing cover off — chain, sprockets and guides.
Symptoms to notice
What to check
Ask the seller
04TDV6 3.0 Timing Chain Stretch and Wear
Can't confirm for this car
CommonEngine $3,000–$8,000 to fix
Can't confirm for this car
The TDV6 3.0 engine fitted to the Discovery 4 uses a timing chain system that is prone to stretch and guide wear, particularly when oil change intervals are extended or low-quality oil is used. A worn timing chain causes retarded cam timing, reduced power, increased fuel consumption, and in severe cases chain jump or snap leading to severe engine damage.
Example of the part — not this vehicleThe front of a twin-cam engine with the timing cover off — chain, sprockets and guides.
Symptoms to notice
What to check
Ask the seller
05Transfer Case Vibration and Differential Lock Failure
Can't confirm for this car
CommonTransmission $2,500–$7,000 to fix
Can't confirm for this car
The Discovery 4 uses an updated transfer case compared to the Discovery 3 but shares similar failure modes including electronic differential lock actuator failure, internal chain wear, and vibration transmitted to the cabin under certain load conditions. Vehicles used for moderate off-road work or heavy towing are at increased risk.
Symptoms to notice
What to check
Ask the seller
06ZF 6HP26 Automatic Transmission Mechatronic Unit Failure
Can't confirm for this car
CommonTransmission $2,200–$6,500 to fix
Can't confirm for this car
The ZF 6HP26 six-speed automatic transmission fitted to Discovery 3 and 4 models uses an integrated mechatronic unit that combines the valve body and electronic control module into a single assembly immersed in transmission fluid. The multi-pin external wiring harness connector is prone to moisture ingress which corrodes the internal circuit board tracks and solenoid driver circuits. Failed solenoid actuation causes pressure regulation errors that manifest as harsh, delayed or missed gear changes and eventual limp-home mode engagement. Complete mechatronic failure results in the transmission locking into a single forward gear.
Symptoms to notice
What to check
Ask the seller
Electrical
01Terrain Response Control Module and Actuator Failure
Can't confirm for this car
OccasionalElectrical $1,500–$5,500 to fix
Can't confirm for this car
The Terrain Response system uses a dedicated electronic control module (TRCM) communicating over CAN bus to manage differential locks, throttle mapping, transmission shift patterns, and stability program calibration. The module can develop internal CAN communication faults or EEPROM corruption. Separately, the rotary actuators that physically execute differential lock and throttle bypass commands use small geared DC motors that strip teeth or seize, preventing mode changes. Either failure disables the entire Terrain Response system including Hill Descent Control.
Symptoms to notice
What to check
Ask the seller
Body, brakes, suspension & interior
01Front Differential Mounting Crossmember Corrosion Perforation
Can't confirm for this car
CommonBody & Rust $3,500–$12,000 to fix
Can't confirm for this car
The front differential and lower wishbone rear pick-up points are carried by a fabricated steel crossmember that forms part of the forward chassis structure. The crossmember is box-section steel and traps road contamination and moisture at welded seams. Internal corrosion progresses unseen until the section walls perforate. In advanced cases the differential mounting captive nuts pull through the corroded metal and the front differential shifts under load. This is a structural failure with implications for front geometry, crashworthiness, and WoF/MoT compliance.
Symptoms to notice
What to check
Ask the seller
02Front Lower Wishbone Ball Joint Wear and Failure
Can't confirm for this car
CommonSuspension $600–$2,200 to fix
Can't confirm for this car
The front lower wishbone ball joints on the Discovery 3 and 4 are loaded heavily by the vehicle's considerable kerb weight and off-road use. The ball joint dust boot splits readily when contacted by terrain, allowing water and grit to enter and rapidly accelerate wear of the ball and socket. Worn joints develop measurable axial and radial play. Unlike some designs, the ball joint is integral to the wishbone arm on some variants requiring full arm replacement. Advanced wear can result in sudden joint separation causing complete loss of front wheel control.
 Example of the part — not this vehicle
A separated lower ball joint: the control arm has dropped and the wheel has splayed out under the guard.
Symptoms to notice
What to check
Ask the seller
03Air Suspension Corner Failure - Height Sensor, Air Spring, and Compressor
Can't confirm for this car
Very commonSuspension $800–$3,500 to fix
Can't confirm for this car
The Discovery 3 and 4 (LR3/LR4) use a full air suspension system with corner-specific height sensors, air springs, a compressor, and a valve block. All four corners are independently susceptible to failure. Height sensors develop corrosion and fault at the wiring connector causing the vehicle to incorrectly control ride height. Air springs perish and split (particularly rear springs on high-mileage vehicles). The compressor wears out and the valve block develops leaks. These failures are so prevalent that multiple aftermarket air-to-coil conversion kits exist specifically for this generation. The fault pattern is documented across every major Land Rover owner forum in AU and NZ.
Symptoms to notice
What to check
Ask the seller
What these repairs cost on other cars
Some of the Land Rover LR4’s documented faults are repairs other models share. Each page lists the documented NZ cost for every model it affects.
Other Land Rover models
Land Rover LR4 buyer questions
Is the Land Rover LR4 reliable?
Like any used car, it depends on the specific example and its service history. Across the 10 documented faults for the Land Rover LR4, the recurring problem areas are engine, body & rust, and suspension. A Land Rover LR4 with a full service history and no signs of the issues listed on this page can be a sound buy but each one needs to be checked individually before you commit.
What are the most common problems with a used Land Rover LR4?
We've catalogued 10 known faults for the Land Rover LR4, covering engine, body & rust, and suspension. All 10 are written out in full on this page, with the symptoms to notice, what to inspect, and typical repair costs for each. Free to read, no account needed.
How much do repairs cost on a Land Rover LR4?
Most single repairs on the Land Rover LR4 fall between $2,500–$7,000 at NZ independent-workshop rates. Some of the 10 documented faults cost less and a few cost considerably more, and no one car needs them all. Knowing which ones to look for before you view is what lets you negotiate the price down or walk away.
Should I get a pre-purchase inspection on a Land Rover LR4?
Yes. A Land Rover LR4 inspection focused on its known weak points is the single best way to avoid an expensive mistake. KickTyres gives you a guided, model-specific inspection plus a market valuation and negotiation figure for $24.90 far less than the cost of missing one of the faults on this page.