Skip to content
Toyota2000–2022 Critical issues documented

Toyota LC Prado: common faults & what to check

Thinking about buying a used Toyota LC Prado (2000–2022) in New Zealand? We've documented 29 known faults for this model spanning engine, fluid leaks, cooling, and suspension. Each researched and verified before it's published. The most serious issues here are rated critical. Every one is listed below with its symptoms and repair cost, and each has its own page with where to look and what to ask the seller. Free, no account needed.
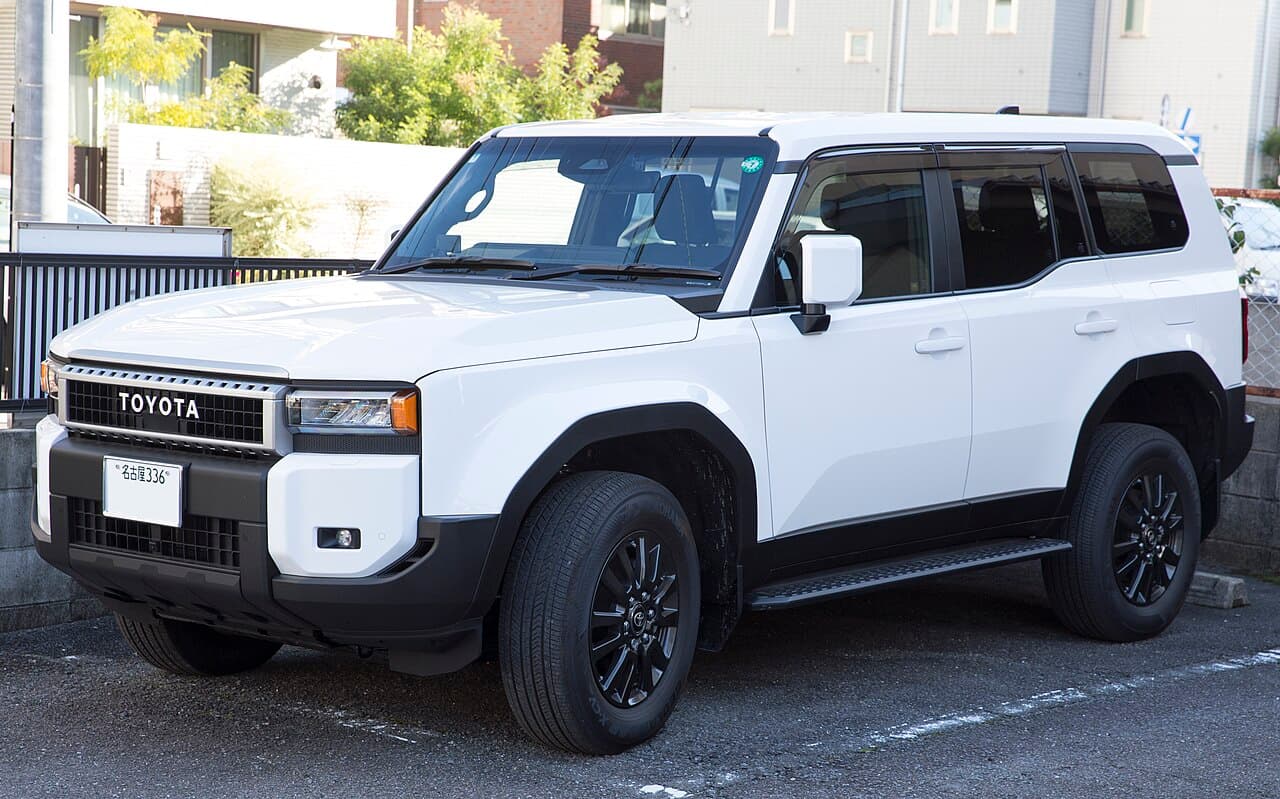
A Toyota LC Prado — example photograph; the generation is not established
Toyota LC Prado. An example of the model — the generation is not established, and it is not the car you are looking at. Photo: Mr.choppers via Wikimedia Commons, CC BY-SA 4.0.

Check this exact Toyota LC Prado

  • Odometer history
  • Money owing
  • Reported stolen
  • Ownership history
  • Official NZ vehicle register data
  • NZ owned and operated

Type the plate for the free basics. The full record is a paid check from $13.49, one car at a time, no subscription.

No NZ plate yet, or buying in Australia? Pick the generation and engine and start a free check below. New to KickTyres? How the check works →

29

Documented faults

Critical

Most serious

$700–$2,200

Typical repair

6

Systems covered

Which Toyota LC Prado are you looking at?

Pick the year and the engine. The faults below narrow to that exact combination, because a 1.8 and a 2.4 of the same car do not fail the same way. Free, no account needed.

Start your free check on this Toyota LC Prado

No plate needed. You get the risk score, the buyer's checklist and the guided inspection for the exact car you picked above — not the whole nameplate.

Toyota LC PradoEngine not picked yet

Pick the engine above first: the LC Prado came with 6, and without it the report has to show all of their faults. Pick the engine

Free. The paid plate check is separate, and stays optional.

Can't confirm for this car

Toyota LC Prado

Nothing has been narrowed yet, so nothing below is a claim about a particular car. Pick a year and an engine to see which faults apply.

Tell us the engine, or check the engine code on the car, before relying on this.

matched on no vehicle context

What to look out for

The checks worth doing on a Toyota LC Prado before you hand over any money. Every documented fault is listed below, each with its own page.

  • Serious issue

    Check for unusual engine knock, loss of compression, or metal shavings in the oil.

    See why

    1KD-FTV Intake Manifold Swirl Flap Fracture

    The plastic swirl flaps inside the 1KD-FTV intake manifold are mounted on a thin metal shaft that corrodes and fractures, releasing plastic or metal fragments directly into the combustion chambers. Ingested debris causes catastrophic piston, valve, and cylinder head damage. Toyota removed swirl flaps in revised manifolds after widespread failures; many owners proactively delete the flaps entirely as a preventive measure.

    What you would notice

    • Sudden severe engine knock or rattling noise
    • Dramatic loss of power under acceleration
    • Engine warning light with codes related to misfires or multiple cylinder failures
    • Metal fragments visible in engine oil or on the oil drain plug magnet
    • Engine hydrolocks or fails to restart after fragments lodge in combustion chamber

    Typically $600–$18,000 to put right.

  • Serious issue

    Request live fuel rail pressure data via OBD-II scanner; pressure below 1,600 bar at wide-open throttle indicates pump wear.

    See why

    1KD-FTV Common Rail High-Pressure Fuel Pump Failure and Injector Contamination

    The Denso HP3/HP4 high-pressure fuel pump on the 1KD-FTV 3.0L diesel sheds internal metallic wear debris into the common rail fuel circuit under normal operating stress, particularly after 150,000 km. This debris migrates downstream and scores the precision-lapped sealing faces inside all four Denso G3 piezo or solenoid injectors, causing them to leak internally or stick open; because the contamination is systemic, partial replacement of injectors without flushing the rail and replacing the pump results in repeat failure within months.

    What you would notice

    • Hard hot-start or prolonged cranking before engine fires
    • Black or white smoke from exhaust under load with loss of power
    • Rough idle with noticeable vibration through the cab
    • MIL illuminated with fuel pressure or injector balance rate codes

    Typically $3,500–$9,000 to put right.

  • Serious issue

    Check for white chalky deposits inside the EGR valve and intake pipework.

    See why

    1KD-FTV EGR Cooler Crack and Coolant Ingestion

    The 1KD-FTV EGR cooler housing is prone to cracking from repeated thermal cycling, allowing coolant to enter the intake system and be ingested into the combustion chambers. Coolant ingestion hydrostatically locks the engine if detected late.

    What you would notice

    • White smoke from exhaust on startup particularly in cold weather
    • White chalky deposits visible inside the EGR valve when inspected

    Typically $1,200–$3,500 to put right.

  • Serious issue

    Pull the engine oil dipstick and check for a milky, caramel or frothy appearance indicating coolant mixing.

    See why

    1KD-FTV EGR Cooler Internal Crack and Coolant Contamination

    The exhaust gas recirculation cooler on the 1KD-FTV is a cast aluminium heat exchanger that cools recirculated exhaust gases using engine coolant. Thermal cycling causes internal cracking of the cooler core, allowing coolant to pass into the EGR circuit and enter the intake manifold. In severe cases coolant reaches the combustion chambers, dilutes engine oil, and can cause hydrolock or bearing damage. Toyota issued a field fix (cooler redesign) but many vehicles in service retain the original unit.

    What you would notice

    • Milky or caramel-coloured engine oil on the dipstick or filler cap
    • Coolant level dropping with no visible external leak
    • White steam or sweet-smelling exhaust at idle when engine is at full operating temperature
    • Engine overheating caused by coolant loss

    Typically $950–$3,200 to put right.

  • Serious issue

    Inspect the rubber boot for tearing or grease ejection.

    See why

    Front Lower Control Arm Ball Joint Wear

    The front lower control arm ball joint on the 150 Series Prado carries the full vertical load of the front suspension and is subjected to additional lateral stress during off-road articulation. The OEM ball joint uses a tapered shank pressed into the lower arm with a rubber boot protecting the grease-packed socket; the boot tears on rocky terrain, allowing contaminants to enter and accelerate wear of the steel ball and nylon or polymer socket. A worn ball joint introduces slop in the steering geometry, causes tyre scrub, and if it separates completely causes sudden loss of steering control.

    What you would notice

    • Clunking or knocking sound from the front suspension over road imperfections
    • Vague or wandering steering feel, particularly at motorway speeds
    • Uneven front tyre wear with accelerated wear on the inner or outer edge
    • Visible torn ball joint boot with grease ejection visible on the lower arm

    Typically $450–$1,400 to put right.

  • Serious issue

    Have an assistant shake the wheel while you watch the lower ball joint for movement.

    See why

    Front Lower Control Arm Ball Joint Wear and Failure

    The front lower control arm ball joints on the 120 series Prado wear progressively, particularly under off-road use or loaded towing. The OEM joint has a relatively soft rubber boot that cracks, allowing dirt ingress and accelerating wear of the ball pin and socket. In NZ/AU market vehicles used on farms or gravel roads, failure rates are elevated. Severe wear causes vague steering and ultimately front wheel misalignment; joint separation is a catastrophic failure mode.

    What you would notice

    • Clunking from front suspension over bumps or during steering inputs
    • Steering wander or pulling to one side
    • Uneven tyre wear on front axle
    • Vibration through the steering wheel on rough surfaces

    Typically $400–$900 to put right.

See all 29 documented issuesEverything researched for the Toyota LC Prado, including 12 rated critical.
Depends on which engine this Toyota LC Prado has — 29Each of these is documented for one particular engine. Pick the year and engine above to see which of them apply.
Engine, transmission & cooling17

011KD-FTV Intake Manifold Swirl Flap Fracture

Check for unusual engine knock, loss of compression, or metal shavings in the oil.diesel2009–2014Engine
CommonEngine $600–$18,000 to fix

Can't confirm for this car

The plastic swirl flaps inside the 1KD-FTV intake manifold are mounted on a thin metal shaft that corrodes and fractures, releasing plastic or metal fragments directly into the combustion chambers. Ingested debris causes catastrophic piston, valve, and cylinder head damage. Toyota removed swirl flaps in revised manifolds after widespread failures; many owners proactively delete the flaps entirely as a preventive measure.

Symptoms to notice

  • Sudden severe engine knock or rattling noise
  • Dramatic loss of power under acceleration
  • Engine warning light with codes related to misfires or multiple cylinder failures
  • Metal fragments visible in engine oil or on the oil drain plug magnet
  • Engine hydrolocks or fails to restart after fragments lodge in combustion chamber

What to check

  1. Check for unusual engine knock, loss of compression, or metal shavings in the oil.
  2. Confirm whether a swirl flap delete kit has been fitted (look for blanking plates on manifold ports).
  3. If a workshop inspection is possible: Remove the air intake hose and inspect inside the intake manifold with a torch for broken or missing flap vanes.

Where to look: Intake manifold — driver's side of the engine, accessible after removing the air intake ducting.

Parts involved: Intake manifold.

Ask the seller

  • “Has a swirl flap delete or blanking kit been fitted to the intake manifold?”
  • “Has the engine ever suffered a sudden power loss or knocking event that required investigation?”
  • “Can you show a compression test result or recent engine inspection report?”

021KD-FTV Common Rail High-Pressure Fuel Pump Failure and Injector Contamination

Request live fuel rail pressure data via OBD-II scanner; pressure below 1,600 bar at wide-open throttle indicates pump wear.diesel2009–2022Engine
CommonEngine $3,500–$9,000 to fix

Can't confirm for this car

The Denso HP3/HP4 high-pressure fuel pump on the 1KD-FTV 3.0L diesel sheds internal metallic wear debris into the common rail fuel circuit under normal operating stress, particularly after 150,000 km. This debris migrates downstream and scores the precision-lapped sealing faces inside all four Denso G3 piezo or solenoid injectors, causing them to leak internally or stick open; because the contamination is systemic, partial replacement of injectors without flushing the rail and replacing the pump results in repeat failure within months.

A single common-rail diesel fuel injector photographed against a plain background.Example of the part — not this vehicle

A common-rail diesel injector. Contamination damages the nozzle at the tip.

Panoha · CC BY-SA 3.0 · Wikimedia Commons

Symptoms to notice

  • Hard hot-start or prolonged cranking before engine fires
  • Black or white smoke from exhaust under load with loss of power
  • Rough idle with noticeable vibration through the cab
  • MIL illuminated with fuel pressure or injector balance rate codes

What to check

  1. Request live fuel rail pressure data via OBD-II scanner; pressure below 1,600 bar at wide-open throttle indicates pump wear.
  2. Remove injector return lines individually to check for excessive back-leak (more than 30 ml per injector in 30 seconds at idle is a fail).
  3. Inspect fuel filter housing for metallic silver particles visible in the bowl.
  4. Check for stored DTCs P0087, P0093, P0191, and individual injector codes P0201–P0204.

Where to look: Engine bay — high-pressure fuel pump mounted on rear of cylinder head; injectors seated in valve cover, one per cylinder

Parts involved: High-pressure fuel pump, Fuel rail, Fuel injector.

Ask the seller

  • “Has the high-pressure fuel pump ever been replaced, and if so, were the injectors and fuel rail flushed at the same time?”
  • “Can you show a recent OBD-II scan confirming no stored P0087 or injector balance codes?”
  • “What is the current odometer reading and has the diesel fuel filter been replaced on schedule every 40,000 km?”

031KD-FTV Cylinder Head Cracking at High Mileage

Check for white steam from exhaust (not condensation) that persists after warm-up.diesel2009 onwardEngine
OccasionalEngine $3,500–$8,000 to fix

Can't confirm for this car

The 1KD-FTV cylinder head is cast aluminium and is susceptible to thermal fatigue cracking between the valve seats and around the pre-combustion chamber inserts after sustained high mileage and overheating events. Cracks typically form at the fire-deck between cylinders 3 and 4 and around the glow plug threads. Coolant intrudes into the combustion chamber, causing white steam from the exhaust, milky oil, and in severe cases hydraulic lock. This failure mode is accelerated by any prior overheating episode or by running the engine with low coolant.

A removed six-cylinder diesel engine cylinder head on cardboard, valve-gear side facing up.Example of the part — not this vehicle

A six-cylinder diesel head off the engine, valve-gear side up. Cracks run between the valve seats on the face beneath.

Ll1324 · CC0 · Wikimedia Commons

Symptoms to notice

  • Persistent white steam from exhaust that continues well after engine warm-up
  • Milky brown emulsion visible on the underside of the oil filler cap or on the dipstick
  • Unexplained coolant loss with no visible external leak
  • Rough idle and misfiring on one or more cylinders caused by coolant in combustion chamber

What to check

  1. Check for white steam from exhaust (not condensation) that persists after warm-up.
  2. Inspect coolant reservoir for oily contamination and oil filler cap for white milky emulsion.
  3. If a workshop inspection is possible: A compression test and cooling system pressure test are mandatory at purchase for vehicles above 200,000 km.

Where to look: Cylinder head fire deck — primarily between cylinders 3 and 4 and around pre-combustion chamber recesses

Parts involved: Cylinder head.

Ask the seller

  • “Has the vehicle ever overheated or run low on coolant?”
  • “When was the coolant last flushed and what colour is it currently?”
  • “Is there any white residue or emulsion on the oil filler cap?”

041KD-FTV Head Gasket Failure

diesel2000–2016Cooling
CommonCooling $2,800–$5,500 to fix

Can't confirm for this car

The 1KD-FTV cylinder head gasket is susceptible to failure, particularly on vehicles used for heavy towing or driven in hilly terrain, where sustained high thermal loads exceed the gasket's design tolerance. Coolant enters the combustion chambers or oil galleries, causing white exhaust smoke, coolant loss, and hydrolock risk. The aluminium cylinder head is also prone to warping if the engine is allowed to overheat even briefly.

A removed multi-layer steel head gasket held up, showing staining around the cylinder bore.Example of the part — not this vehicle

A used multi-layer head gasket. Discolouration between a cylinder and a water gallery is the tell.

John Furman · CC BY-SA 3.0 · Wikimedia Commons

Symptoms to notice

  • White or grey sweet-smelling smoke from the exhaust, especially on startup
  • Coolant level dropping with no external leak
  • Milky or mayonnaise-like sludge on the oil filler cap or dipstick
  • Engine overheating gauge climbing under towing load
  • Bubbling or gurgling in the coolant reservoir when engine is running

What to check

  1. Check for white sweet-smelling exhaust smoke at startup, mayo-like sludge on the oil cap underside, and coolant level dropping without visible external leaks.
  2. Inspect the overflow bottle for oily residue.
  3. If a workshop inspection is possible: Perform a block test (combustion gas test on the coolant reservoir) and a cooling system pressure test.

Where to look: Cylinder head mating face — between the head and engine block, accessible only after engine top-end removal.

Parts involved: Head gasket.

Ask the seller

  • “Has the vehicle ever overheated, and has the head gasket been replaced or the head resurfaced?”
  • “Would you agree to a block test (combustion gas test) being performed before purchase?”
  • “Has the vehicle been used for regular heavy towing, and what loads were towed?”

051KD-FTV EGR Cooler Crack and Coolant Ingestion

Check for white chalky deposits inside the EGR valve and intake pipework.diesel2009 onwardEngine
CommonEngine $1,200–$3,500 to fix

Can't confirm for this car

The 1KD-FTV EGR cooler housing is prone to cracking from repeated thermal cycling, allowing coolant to enter the intake system and be ingested into the combustion chambers. Coolant ingestion hydrostatically locks the engine if detected late.

Symptoms to notice

  • White smoke from exhaust on startup particularly in cold weather
  • White chalky deposits visible inside the EGR valve when inspected

What to check

Check for white chalky deposits inside the EGR valve and intake pipework. Perform a combustion gas test on the coolant. White smoke on startup that clears is characteristic of minor coolant ingestion from EGR cooler seepage.

Where to look: EGR cooler on the right side of the engine, coolant circuit

Parts involved: EGR valve.

Ask the seller

  • “Has the 1kd-ftv egr cooler crack and been inspected or repaired?”

061KD-FTV EGR Cooler Internal Crack and Coolant Contamination

Pull the engine oil dipstick and check for a milky, caramel or frothy appearance indicating coolant mixing.diesel2002–2009Cooling
CommonCooling $950–$3,200 to fix

Can't confirm for this car

The exhaust gas recirculation cooler on the 1KD-FTV is a cast aluminium heat exchanger that cools recirculated exhaust gases using engine coolant. Thermal cycling causes internal cracking of the cooler core, allowing coolant to pass into the EGR circuit and enter the intake manifold. In severe cases coolant reaches the combustion chambers, dilutes engine oil, and can cause hydrolock or bearing damage. Toyota issued a field fix (cooler redesign) but many vehicles in service retain the original unit.

Symptoms to notice

  • Milky or caramel-coloured engine oil on the dipstick or filler cap
  • Coolant level dropping with no visible external leak
  • White steam or sweet-smelling exhaust at idle when engine is at full operating temperature
  • Engine overheating caused by coolant loss

What to check

  1. Pull the engine oil dipstick and check for a milky, caramel or frothy appearance indicating coolant mixing.
  2. Check the coolant overflow reservoir for an oily film.
  3. Inspect the intake side of the EGR valve for white residue or coolant deposits.
  4. Check for white steam from the exhaust at operating temperature.
  5. Confirm coolant level has not been dropping without a visible external leak.

Where to look: Left rear of engine block, between the exhaust manifold EGR port and the intake manifold, cooled by a coolant hose loop

Parts involved: EGR valve.

Ask the seller

  • “Has the EGR cooler ever been replaced or inspected, and with which part number?”
  • “Has the oil ever shown any signs of milkiness or water contamination?”
  • “Can I see the last two oil service receipts to check for abnormal coolant loss notes?”

07Transfer Case Drive Chain Wear and Vibration

Drain and inspect the transfer case oil for metallic silver particles or a silvery sheen indicating chain wear.2009–2022Transmission
OccasionalTransmission $1,800–$4,500 to fix

Can't confirm for this car

The 150 Series Prado uses an electronically-controlled part-time transfer case (on manual-shift variants) or an active-torque-split unit in which a silent chain drives the front output shaft from the main shaft. The chain stretches with wear, introducing lash that causes vibration felt through the floor and transmission tunnel, particularly in 4H or 4L at road speeds. A worn chain can also jump under hard acceleration, making abrupt contact with the transfer case housing and causing metallic debris to contaminate the transfer case oil; in advanced cases the chain snaps, leaving the vehicle with no drive to one or both axles.

Symptoms to notice

  • Vibration felt through the floor or centre console specifically in 4WD modes that is absent in 2H
  • Metallic particles on the transfer case drain plug magnet beyond expected black paste
  • Clunking or rattling sound from the transfer case area on hard acceleration in 4WD
  • Difficulty engaging or disengaging 4WD modes via the dash switch or selector

What to check

Drain and inspect the transfer case oil for metallic silver particles or a silvery sheen indicating chain wear. If a workshop inspection is possible: On vehicles above 150,000 km with no recorded transfer case service, consider a spectrometric oil analysis to quantify iron and chromium particles. Road test in 4H at 80 km/h and feel for a vibration through the gear lever and floor that is not present in 2H — this is the classic chain-stretch symptom. If access permits, remove the transfer case drain plug and inspect the magnetic plug tip for metal accumulation beyond the expected fine black paste.

Where to look: Drivetrain — transfer case mounted behind the main gearbox, mid-vehicle beneath the centre console

Parts involved: Transfer case.

Ask the seller

  • “Has the transfer case oil been changed, and if so what did the drained oil look like?”
  • “Is there any vibration that appears specifically in 4WD mode and goes away in 2H?”
  • “Has the transfer case ever been opened or reconditioned?”

08A750F Automatic Transmission Torque Converter Shudder

Drive the vehicle at a steady 80 km/h on a flat road with light throttle.petrol2009 onwardTransmission
CommonTransmission $300–$3,500 to fix

Can't confirm for this car

The A750F five-speed automatic transmission fitted behind the 1GR-FE V6 petrol develops a torque converter lock-up clutch shudder. The shudder occurs when the converter clutch applies in 4th or 5th gear at light throttle cruise speeds between 60–100 km/h. The friction material on the lock-up clutch glazes or wears, and the ATF breaks down, causing the clutch to chatter rather than engage smoothly. Many owners mistake this for an engine misfire. The condition is confirmed by the shudder disappearing when the accelerator is fully released or when the transmission is shifted to a lower gear. Toyota specified a drain-and-fill ATF change as the first corrective step, but in advanced cases the torque converter requires replacement.

A cutaway automatic transmission torque converter showing the internal turbine and stator.Example of the part — not this vehicle

A torque converter, sectioned. The lock-up clutch inside is what shudders.

No machine-readable author provided. BerndB~commonswiki assumed (based on copyright claims). · CC BY-SA 3.0 · Wikimedia Commons

Symptoms to notice

  • Rhythmic or pulsing vibration felt through the floor and seat at 60–100 km/h at light steady throttle, resembling an engine misfire
  • Shudder disappears immediately when throttle is released or when the gear selector is dropped to 3rd or Sport mode
  • Condition worsens progressively with mileage and is significantly worse when ATF is due for replacement
  • Occasional hesitation or hunting between converter lockup and slip states at cruise speeds

What to check

  1. Drive the vehicle at a steady 80 km/h on a flat road with light throttle.
  2. A shudder felt through the floor, seat, and steering wheel in a regular oscillating pattern at this speed indicates torque converter lock-up clutch shudder.
  3. Confirm the ATF is not burnt or dark — fresh ATF should be red and clear.
  4. Check transmission service history for fluid change intervals.

Where to look: Automatic transmission — torque converter at the front of the transmission bell housing between engine and gearbox

Parts involved: Torque converter.

Ask the seller

  • “Do you feel any vibration or shudder through the car at around 80 km/h on light throttle?”
  • “When was the transmission fluid last changed, and has it ever been changed?”
  • “Has a transmission specialist ever diagnosed the vehicle for torque converter issues?”

091KD-FTV EGR Valve Failure and Inlet Manifold Carbon Clogging

Scan for EGR position sensor fault codes (P0400, P0401, P0402, P0403).diesel2009–2015Engine
Very commonEngine $800–$3,000 to fix

Can't confirm for this car

The 1KD-FTV diesel uses an exhaust gas recirculation (EGR) system to reduce NOx emissions. Over time, oily soot from the EGR circuit coats the EGR valve, the EGR cooler, and the inlet manifold with a thick carbon paste. The EGR valve sticks either open or closed. When stuck open the engine runs rough, produces excessive smoke, and may enter limp mode. When the inlet manifold becomes severely restricted the engine loses significant power, surges under load, and can produce black smoke. The EGR cooler can also crack internally, allowing coolant to mix with exhaust gas and enter the inlet.

Symptoms to notice

  • Significant power loss under load, particularly when towing or climbing grades, with black smoke under acceleration
  • Rough or uneven idle with occasional surging, worsening when the engine is at operating temperature
  • Check engine light with EGR system fault codes (P0400 series) stored in ECU memory
  • Engine entering limp mode with reduced power output, clearing temporarily after restart

What to check

Scan for EGR position sensor fault codes (P0400, P0401, P0402, P0403). Check coolant for contamination if EGR cooler failure is suspected. If a workshop inspection is possible: Remove the intake snorkel or air filter housing and inspect the inlet tract for oily black carbon deposit build-up. A borescope inspection of the inlet manifold runners will reveal the extent of carbon clogging.

Where to look: Inlet manifold and EGR valve on the left side of the engine, with EGR cooler mounted on the exhaust manifold side

Parts involved: Intake manifold, EGR valve.

Ask the seller

  • “Has the EGR valve or inlet manifold ever been cleaned or replaced?”
  • “Does the engine ever lose power or enter limp mode, particularly when towing or under heavy load?”
  • “Has the vehicle had a diagnostic scan recently — are there any stored EGR-related fault codes?”

10Automatic Transmission Torque Converter Shudder

Test drive at a steady 70 to 90 km/h on light throttle on a flat road.2002–2009Transmission
OccasionalTransmission $250–$2,800 to fix

Can't confirm for this car

The A750F five-speed automatic transmission used in higher-specification 120 series Prado models is prone to torque converter clutch (TCC) shudder. The TCC engages at light throttle cruising speeds between 60 and 100 km/h to improve fuel economy; contaminated or degraded automatic transmission fluid causes the clutch to slip intermittently rather than lock cleanly, producing a resonant vibration felt through the drivetrain and floor. The fault is frequently misdiagnosed as engine misfire or driveshaft vibration. A TCC shudder additive fix works temporarily; severe cases require a fluid flush with Toyota ATF Type T-IV or full torque converter replacement.

A cutaway automatic transmission torque converter showing the internal turbine and stator.Example of the part — not this vehicle

A torque converter, sectioned. The lock-up clutch inside is what shudders.

No machine-readable author provided. BerndB~commonswiki assumed (based on copyright claims). · CC BY-SA 3.0 · Wikimedia Commons

Symptoms to notice

  • Intermittent vibration or shudder felt through the floor and drivetrain at steady light-throttle speeds between 60 and 100 km/h
  • Shudder disappears immediately when accelerating firmly or lifting off the throttle completely
  • ATF that is dark, smells burnt or is overdue for a change
  • Fault may trigger a transmission-related DTC in advanced cases

What to check

  1. Test drive at a steady 70 to 90 km/h on light throttle on a flat road.
  2. A shudder or buzz felt through the seat and floor between 60 and 100 km/h that disappears when accelerating or decelerating is characteristic of TCC slip.
  3. Check the ATF colour and smell via the dipstick – burnt or dark fluid accelerates the fault.
  4. Confirm the correct Toyota ATF Type T-IV has been used and that the fluid has been changed at the recommended interval.

Where to look: Automatic transmission torque converter, inside the bell housing at the front of the transmission, accessible only after transmission removal

Parts involved: Torque converter.

Ask the seller

  • “Does the vehicle shudder or vibrate at highway cruising speed under light throttle?”
  • “When was the automatic transmission fluid last changed, and was Toyota ATF Type T-IV used?”
  • “Has any transmission additive or shudder fix ever been added to the fluid?”

111GR-FE Secondary Air Injection Pump and Check Valve Failure

petrol2009–2022Engine
CommonEngine $900–$2,800 to fix

Can't confirm for this car

The secondary air injection (SAI) system on the 1GR-FE 4.0L V6 petrol engine pumps fresh air into the exhaust ports during cold start to accelerate catalytic converter light-off and reduce hydrocarbon emissions. The system's rubber-diaphragm check valves crack after heat cycling, allowing exhaust gas backflow to reach the electric pump motor; the hot, acidic exhaust gas destroys the motor windings and seizes the impeller, typically between 80,000 and 150,000 km. Failed check valves alone cause intermittent faults, but once the pump motor seizes the repair cost escalates significantly.

Symptoms to notice

  • Check engine light on cold start that may clear after the engine warms up
  • Audible absence of the secondary air pump sound during the first 60 seconds of a cold start
  • Failed warrant of fitness emissions test due to elevated cold-start hydrocarbons
  • DTC codes P0410, P0411, or P0418 stored in the ECM

What to check

With the engine cold, start it and listen for the pump running for approximately 60 seconds from a low position near the right inner guard — a seized pump produces silence or a single click from the relay. Physically inspect the rubber check valves on both exhaust manifold banks for cracks or heat distortion. If a workshop inspection is possible: Connect a scan tool and check for codes P0410 (SAI system malfunction), P0411 (incorrect SAI flow), and P0418 (SAI pump relay circuit).

Where to look: Engine bay — SAI pump mounted low on passenger side of engine; check valves located on the exhaust manifolds on both cylinder banks

Parts involved: High-pressure fuel pump.

Ask the seller

  • “Has the secondary air injection pump or check valves ever been replaced?”
  • “Does the check engine light come on during cold starts and clear after the engine warms up?”
  • “Can you demonstrate a cold start so the SAI pump can be heard running?”

12Transfer Case Electromagnetic Actuator Failure

Attempt to cycle through 2H, 4H, and 4L with the vehicle stationary on a flat surface.2009 onwardTransmission
CommonTransmission $800–$2,200 to fix

Can't confirm for this car

The 150 Series Prado uses an electronically controlled part-time 4WD system with an electromagnetic actuator (the ADD actuator and the transfer case shift motor) to engage and disengage the front axle and switch between 2H, 4H, and 4L modes. The actuator motor and its internal position sensor fail, leaving the transfer case stuck in one range or unable to shift out of 4WD. The failure is often intermittent initially, with the 4WD warning light flashing. Water ingress into the actuator connector accelerates failure. This is a known failure on vehicles used for touring or water crossing where the actuator is exposed to mud and water.

Symptoms to notice

  • Four-wheel drive warning light flashing or remaining illuminated after attempting a range change
  • Transfer case refusing to shift out of 4WD or stuck in 4L, causing transmission wind-up on sealed roads
  • Grinding or clicking noise from the transfer case during attempted range change with no actual shift occurring
  • Intermittent inability to engage 4WD, which resolves briefly then fails again

What to check

Attempt to cycle through 2H, 4H, and 4L with the vehicle stationary on a flat surface. The shift should complete within 3 seconds with no warning lights. Check the actuator connector under the vehicle for corrosion or water damage. Scan for transfer case position sensor fault codes.

Where to look: Transfer case on the underside of the vehicle — actuator motor bolted to the side of the transfer case housing

Parts involved: Transfer case.

Ask the seller

  • “Has the vehicle been used for river crossings or serious off-road work with water exposure?”
  • “Does the 4WD system engage and disengage cleanly through all ranges without warning lights?”
  • “Have you ever had the transfer case actuator or connector inspected or replaced?”

131KD-FTV Injector O-Ring / Copper Washer Failure (Fuel in Oil)

Pull the engine oil dipstick and smell for diesel odour; check oil level (rises above max if fuel is diluting it).diesel2009–2015Engine
Very commonEngine $800–$2,200 to fix

Can't confirm for this car

The injector O-rings and copper sealing washers on the 1KD-FTV deteriorate over time, allowing diesel fuel to bypass the injector seat and contaminate the engine oil. Affected oil turns thin, smells strongly of diesel, and loses its lubrication properties. Continued operation accelerates bearing and crankshaft wear; Toyota issued a revised copper washer kit and updated injector O-ring specification to address this.

A single common-rail diesel fuel injector photographed against a plain background.Example of the part — not this vehicle

A common-rail diesel injector. Contamination damages the nozzle at the tip.

Panoha · CC BY-SA 3.0 · Wikimedia Commons

Symptoms to notice

  • Engine oil smells strongly of diesel / petrol-like odour
  • Oil level rises above the maximum mark on dipstick
  • Thin, watery-looking oil on dipstick
  • Visible fuel staining or weeping around injector clamp area
  • Increased oil consumption or need for frequent oil changes

What to check

  1. Pull the engine oil dipstick and smell for diesel odour; check oil level (rises above max if fuel is diluting it).
  2. Inspect under-bonnet area around injector clamps for weeping fuel staining.
  3. Check service records for injector O-ring replacement history.

Where to look: Top of engine — injector bodies seated in the cylinder head, accessible from the engine bay after removing the rocker cover.

Parts involved: Fuel injector.

Ask the seller

  • “Has the injector O-rings and copper sealing washers ever been replaced, and can you show a service record?”
  • “When was the engine oil last changed, and does it smell normal?”
  • “Has any mechanic noted elevated oil levels or diesel contamination in the oil?”

142TR-FE Timing Chain Tensioner Rattle

Cold-start from overnight cold and listen for metallic rattle from the front of the engine.petrol2009 onwardEngine
CommonEngine $600–$1,800 to fix

Can't confirm for this car

The 2TR-FE 2.7 petrol timing chain tensioner loses oil film overnight causing metallic rattle on cold start. Rattle that persists beyond 10 seconds at idle or appears at operating temperature indicates worn tensioner or plastic chain guides requiring immediate attention.

The front of a dual overhead camshaft engine with the timing cover removed, exposing the timing chain and sprockets.Example of the part — not this vehicle

The front of a twin-cam engine with the timing cover off — chain, sprockets and guides.

Logansenf · CC BY-SA 4.0 · Wikimedia Commons

Symptoms to notice

  • Metallic rattle from engine front on cold start
  • Rattle persisting beyond 10 seconds or remaining audible at operating temperature

What to check

Cold-start from overnight cold and listen for metallic rattle from the front of the engine. Normal: clears in under 5 seconds. If a workshop inspection is possible: Check for stored cam timing fault codes with a scan tool.

Where to look: Front of engine, timing chain tensioner and guides

Parts involved: Timing chain.

Ask the seller

  • “Has the 2tr-fe timing chain tensioner rattle been inspected or repaired?”

151KD-FTV Injector Leak-Off Return Line O-Ring Failure

With engine warm, open the bonnet and smell for raw diesel.diesel2002–2009Engine
Very commonEngine $280–$750 to fix

Can't confirm for this car

The plastic leak-off pipes and rubber O-rings that connect the injector return fuel lines on the 1KD-FTV 3.0 D4D engine degrade with heat cycling. Failed O-rings allow raw diesel to weep from the injector return circuit at the top of the cylinder head, producing a strong fuel smell and visible seepage. Left unaddressed the fuel can pool near hot exhaust components and create a fire risk.

A single common-rail diesel fuel injector photographed against a plain background.Example of the part — not this vehicle

A common-rail diesel injector. Contamination damages the nozzle at the tip.

Panoha · CC BY-SA 3.0 · Wikimedia Commons

Symptoms to notice

  • Strong diesel smell from the engine bay, especially after a warm shutdown
  • Visible diesel staining or wet residue on the top of the cylinder head around injector fittings
  • Slight increase in fuel consumption without a mechanical cause
  • White or grey smoke on startup if leaked fuel contacts the exhaust manifold

What to check

  1. With engine warm, open the bonnet and smell for raw diesel.
  2. Inspect the plastic leak-off pipes and their O-ring seats at each injector for staining, wetness or dried diesel deposits.
  3. Check the return rail for cracks at the snap-fit connectors.
  4. Press on each connector to confirm it is fully seated.

Where to look: Top of cylinder head, injector leak-off rail and individual injector return port fittings

Parts involved: Fuel injector.

Ask the seller

  • “Has the injector leak-off O-ring set ever been replaced, and do you have a receipt?”
  • “Do you notice any diesel smell from the engine bay after a run?”
  • “Has the engine bay top end ever been steam-cleaned or degreased recently?”

16Rear Differential Rear Pinion Seal Oil Leak

Inspect the front face of the rear differential housing and the rear propshaft yoke for oil residue, staining, or active seepage.2009–2022Engine
CommonEngine $250–$700 to fix

Can't confirm for this car

The rear pinion seal on the 150 Series Prado's rear differential sits at the nose of the differential housing where the rear propeller shaft yoke connects. The seal lip wears against the pinion flange and hardens with age and heat, allowing gear oil to weep past it and coat the underside of the diff housing and driveshaft. If the oil level drops sufficiently, the pinion and ring gear bearings run dry and suffer accelerated wear, converting a $200 seal job into a full differential rebuild costing several thousand dollars.

Symptoms to notice

  • Oil stain or wet patch on driveway centred under the rear differential
  • Gear oil smell from underneath the vehicle after a run
  • Whining or humming from the rear axle that intensifies with vehicle speed
  • Oil residue on the rear propshaft or inner face of rear brake drum

What to check

  1. Inspect the front face of the rear differential housing and the rear propshaft yoke for oil residue, staining, or active seepage.
  2. Check the rear diff oil level via the filler plug on the side of the housing — oil should reach the bottom of the filler hole.
  3. Look for oil flung onto the inner faces of the rear brake drums or along the driveshaft tunnel.
  4. A worn pinion flange will show a polished groove worn by the old seal; if a groove is present the flange must be replaced along with the seal.

Where to look: Underside of vehicle — front face of rear differential housing where the rear propshaft yoke meets the pinion flange

Parts involved: Differential.

Ask the seller

  • “When was the rear differential oil last changed, and has the pinion seal area been inspected for leaks?”
  • “Has a rear diff oil leak ever been repaired on this vehicle?”
  • “Is there any noise from the rear axle on acceleration or overrun?”

17Rear Differential Pinion and Axle Oil Seal Failure

Park on a clean surface overnight, then check for fresh gear oil spots under the rear diff.2002–2009Engine
CommonEngine $200–$600 to fix

Can't confirm for this car

The rear differential pinion seal and axle shaft seals on the 120 series Prado are prone to weeping gear oil from approximately 100,000 km onward. The seals harden and shrink with age and heat cycling, losing their ability to retain 80W-90 or 75W-140 gear oil under the thermal expansion of the differential. Low diff oil leads to premature wear of the crown wheel, pinion and carrier bearings. The failure is accelerated in vehicles used for towing or regular off-road use.

Symptoms to notice

  • Gear oil spots or puddles beneath the rear of the vehicle after standing overnight
  • Burnt gear oil smell after off-road or towing use when oil contacts hot exhaust
  • Differential whine or rumble under load in advanced cases due to lubricant starvation

What to check

  1. Park on a clean surface overnight, then check for fresh gear oil spots under the rear diff.
  2. Inspect the pinion flange seal at the front of the diff housing for oily residue or dried gear oil streaks.
  3. Check both axle flanges where the axle shaft exits the housing.
  4. Wipe the areas clean and re-check after a test drive.
  5. Check diff oil level via the fill plug; it should be at the bottom of the fill-plug hole.

Where to look: Rear of the vehicle, at the rear differential housing pinion nose and at each axle shaft exit point on the left and right diff flanges

Parts involved: Differential.

Ask the seller

  • “When were the rear differential seals last replaced or inspected?”
  • “Has the diff oil ever been checked or changed, and when?”
  • “Has the vehicle been used for towing or off-road driving regularly?”
Body, brakes, suspension & interior10

01Rear Leaf Spring Fatigue Crack Under Sustained Load

The 150 Series Prado uses a multi-leaf rear spring pack to support the load area and tow load.2009–2022Suspension
OccasionalSuspension $700–$2,000 to fix

Can't confirm for this car

The 150 Series Prado uses a multi-leaf rear spring pack to support the load area and tow load. Repeated cyclical stress from sustained heavy loads, towing near the vehicle's 3,000 kg braked capacity, or high-frequency vibration from corrugated outback roads causes fatigue cracks to initiate at the clip-bolt holes or at the spring eye bushings in the main leaf. A cracked main leaf allows the pack to separate, dropping one side of the rear axle and causing immediate loss of vehicle control; in towing configurations, an abrupt lean can jackknife a trailer.

Symptoms to notice

  • Audible creak or clunk from the rear suspension under load or over undulations
  • Visible side-to-side rear height difference when the vehicle is unladen on flat ground
  • Rear end wander or dog-tracking particularly when towing
  • Visible crack line or displaced leaf visible through the wheel arch on inspection

What to check

  1. Inspect the full length of each leaf, paying particular attention to the area around the U-bolt mounting plate, the spring eye at both ends, and any clip or centre bolt holes — these are stress concentration points where cracks initiate.
  2. Look for displacement between individual leaves suggesting a broken leaf within the pack.
  3. Check rear ride height on both sides with the vehicle unladen — a measurable side-to-side difference indicates a softened or partially cracked pack.
  4. Examine for corroded or cracked interleaf plastic or rubber separators that promote fretting corrosion between leaves.

Where to look: Rear suspension — leaf spring packs, one each side, running longitudinally under the rear load floor

Parts involved: Rear leaf spring.

Ask the seller

  • “Has the vehicle been used regularly for towing at or near its maximum braked tow capacity?”
  • “Have the rear leaf springs been inspected for cracks, and has any leaf ever been replaced?”
  • “Has the vehicle been driven extensively on unsealed corrugated roads?”

02Brake Booster Vacuum Pump Failure (1KD-FTV Diesel)

With the engine off, pump the brake pedal five times to deplete any stored vacuum.diesel2009 onwardBrakes
OccasionalBrakes $700–$1,800 to fix

Can't confirm for this car

Diesel engines produce no intake manifold vacuum, so the 150 Series Prado 1KD-FTV uses a separate engine-driven vacuum pump mounted on the cylinder head to supply the brake booster. The pump relies on engine oil lubrication via a dedicated feed passage. Sludge from infrequent oil changes, or degraded pump vanes, causes the pump to lose output. The brake pedal becomes progressively harder and requires greater force for the same braking effect. In advanced failure the pedal can feel almost solid, drastically increasing stopping distances. This is a safety-critical fault.

Symptoms to notice

  • Brake pedal feels unusually hard and requires much greater force to achieve normal stopping power
  • Pedal does not drop when the engine is started from a fully pumped-down state
  • Hissing sound from the brake booster area under hard braking indicating a vacuum leak downstream of the failed pump
  • Increased stopping distances particularly noticeable in an emergency braking situation

What to check

With the engine off, pump the brake pedal five times to deplete any stored vacuum. Hold firm pressure on the pedal and start the engine — the pedal should drop noticeably as vacuum builds within 1–2 seconds. If the pedal remains firm after engine start, vacuum pump output is insufficient. Inspect the vacuum line from pump to booster for cracks.

Where to look: Cylinder head — vacuum pump mounted at the rear of the head, belt or gear driven off the camshaft

Parts involved: Intake manifold, Cylinder head.

Ask the seller

  • “Has the brake booster or vacuum pump ever been inspected or replaced?”
  • “Does the brake pedal ever feel harder than normal, especially when first starting the vehicle?”
  • “Are you aware of the oil change history — has it been serviced on schedule with the correct oil grade?”

03Front Lower Control Arm Ball Joint Wear

Inspect the rubber boot for tearing or grease ejection.2009–2022Suspension
CommonSuspension $450–$1,400 to fix

Can't confirm for this car

The front lower control arm ball joint on the 150 Series Prado carries the full vertical load of the front suspension and is subjected to additional lateral stress during off-road articulation. The OEM ball joint uses a tapered shank pressed into the lower arm with a rubber boot protecting the grease-packed socket; the boot tears on rocky terrain, allowing contaminants to enter and accelerate wear of the steel ball and nylon or polymer socket. A worn ball joint introduces slop in the steering geometry, causes tyre scrub, and if it separates completely causes sudden loss of steering control.

The front wheel of a car splayed outward with the lower control arm hanging down after a ball joint separation.Example of the part — not this vehicle

A separated lower ball joint: the control arm has dropped and the wheel has splayed out under the guard.

Elfix · CC0 · Wikimedia Commons

Symptoms to notice

  • Clunking or knocking sound from the front suspension over road imperfections
  • Vague or wandering steering feel, particularly at motorway speeds
  • Uneven front tyre wear with accelerated wear on the inner or outer edge
  • Visible torn ball joint boot with grease ejection visible on the lower arm

What to check

Inspect the rubber boot for tearing or grease ejection. On vehicles with a lift kit or aftermarket control arms, confirm the replacement ball joint is rated for the increased articulation angle. Check for uneven tyre wear indicating prolonged camber change from loose joints. If a workshop inspection is possible: With the vehicle on a hoist, grasp the tyre at 6 and 12 o'clock and apply firm vertical force — any perceptible knock or movement at the lower ball joint indicates replacement is required.

Where to look: Front suspension — lower control arm, one each side, connecting the arm to the steering knuckle

Parts involved: Ball joint.

Ask the seller

  • “Have the front lower ball joints been inspected or replaced, and at what mileage?”
  • “Has the vehicle been used off-road, and has it been fitted with a suspension lift?”
  • “Is there any clunking noise over speed humps or corrugated roads?”

04Front Lower Control Arm Ball Joint Wear and Failure

Have an assistant shake the wheel while you watch the lower ball joint for movement.2002–2009Suspension
CommonSuspension $400–$900 to fix

Can't confirm for this car

The front lower control arm ball joints on the 120 series Prado wear progressively, particularly under off-road use or loaded towing. The OEM joint has a relatively soft rubber boot that cracks, allowing dirt ingress and accelerating wear of the ball pin and socket. In NZ/AU market vehicles used on farms or gravel roads, failure rates are elevated. Severe wear causes vague steering and ultimately front wheel misalignment; joint separation is a catastrophic failure mode.

The front wheel of a car splayed outward with the lower control arm hanging down after a ball joint separation.Example of the part — not this vehicle

A separated lower ball joint: the control arm has dropped and the wheel has splayed out under the guard.

Elfix · CC0 · Wikimedia Commons

Symptoms to notice

  • Clunking from front suspension over bumps or during steering inputs
  • Steering wander or pulling to one side
  • Uneven tyre wear on front axle
  • Vibration through the steering wheel on rough surfaces

What to check

Have an assistant shake the wheel while you watch the lower ball joint for movement. Inspect the boot for cracking or grease loss. If a workshop inspection is possible: With vehicle on a hoist or ramps, grasp the tyre at 6 and 12 o'clock and rock firmly — any play indicates ball joint or wheel bearing wear.

Where to look: Front lower control arm — ball joint at the inner face of the front wheel hub, both sides

Parts involved: Ball joint.

Ask the seller

  • “Have the front lower ball joints ever been replaced?”
  • “Is the vehicle used off-road regularly or on gravel roads?”
  • “When was the last front-end alignment performed?”

05Rear Coil Spring Fatigue Cracking

Look at the bottom coil and the coil immediately above the lower seat for rust cracks, fractures or missing sections.2002–2009Suspension
OccasionalSuspension $350–$750 to fix

Can't confirm for this car

The rear coil springs on the 120 series Prado are susceptible to fatigue cracking, typically at the lowermost coil where stress concentrations are highest and where contact with the spring perch traps moisture. A cracked spring can shed a fragment, puncture the tyre, and collapse the rear suspension on one side. The failure is more common on vehicles with high kilometres, heavy regular loads, or frequent off-road use. It is a Warrant of Fitness failure item in New Zealand under the suspension section.

Symptoms to notice

  • Visible crack, fracture or break in one of the rear coil spring coils, typically the lowest coil
  • Rear of vehicle sitting noticeably lower on one side without added load
  • Knocking or clunking from the rear suspension that cannot be attributed to shock absorbers or bushings

What to check

Look at the bottom coil and the coil immediately above the lower seat for rust cracks, fractures or missing sections. Tap the spring with a metal rod – a cracked spring produces a dull thud rather than a clear ring. Check the lower spring perch for rust damage and spring fragment debris. If a workshop inspection is possible: Inspect each rear coil spring visually with the vehicle at ride height and again on a hoist.

Where to look: Rear suspension, coil springs seating on the rear axle perch and upper chassis mount, typically cracking at the bottom coil near the lower seat

Ask the seller

  • “Have the rear coil springs ever been replaced or inspected for cracking?”
  • “Has the vehicle regularly carried heavy loads or a rooftop tent?”
  • “Does the rear of the vehicle sit level when unloaded?”

06KDSS Hydraulic System Seal Leak and Loss of Function

2003 onwardSuspension
OccasionalSuspension $1,200–$3,500 to fix

Can't confirm for this car

The Kinetic Dynamic Suspension System (KDSS) fitted to GX/GXL and VX/Kakadu grade Prados uses hydraulic cylinders on each sway bar to passively disconnect the anti-roll bars off-road and reconnect on-road. The hydraulic cylinder seals and line fittings develop weeps as the system ages, typically at 100,000–180,000 km. Fluid loss causes the KDSS to partially lock in either off-road or on-road mode. Full seal replacement requires specialist knowledge and correct hydraulic fluid and bleed procedure. Affects both 120 and 150 series KDSS-equipped variants.

Symptoms to notice

  • Oil staining or drips under the front or rear sway bar cylinder area
  • Handling noticeably stiffer off-road than expected — KDSS locked in on-road mode
  • Excessive body roll on-road — KDSS locked in off-road mode
  • KDSS warning light on dashboard on later 150 series variants

What to check

  1. Locate the KDSS hydraulic cylinders on both front and rear sway bars and inspect for oil weeping at the cylinder body, rod seal, and hydraulic line connections.
  2. Check the KDSS reservoir level under the bonnet.
  3. Note any asymmetry in on-road versus off-road handling character indicating partial lock.

Where to look: KDSS hydraulic cylinders on front and rear sway bars, hydraulic lines and reservoir in engine bay

Ask the seller

  • “Is the vehicle KDSS-equipped and has the system ever been serviced?”
  • “Any oil drips visible under the sway bar area?”
  • “Has the KDSS warning light ever illuminated?”

07Power Steering Rack Knock and Rattle Over Bumps

2009 onwardSuspension
CommonSuspension $400–$2,500 to fix

Can't confirm for this car

The 150 Series Prado rack-and-pinion hydraulic power steering rack develops a knock or clunk when the wheels are turned over undulations or speed bumps. The failure mode is internal rack wear causing excessive play between the rack and the housing yoke spring. The yoke plug loosens progressively and the spring pre-load on the rack teeth reduces, allowing the rack to knock against the housing. Toyota released a revised yoke adjustment procedure but on higher-mileage vehicles the rack itself has worn beyond adjustment and requires replacement. The fault is also caused by worn inner tie rod ends within the rack assembly.

Symptoms to notice

  • Clunking or knocking noise from the front of the vehicle when driving over bumps or dips with the steering in the straight-ahead position
  • Vague or wandering steering feel with a dead spot in the centre of the wheel travel
  • Knock felt through the steering wheel when one front wheel drops into a pothole
  • Noise changes or worsens when the steering is turned slightly off-centre while traversing rough surfaces

What to check

With the vehicle on level ground and engine running, push and pull the steering wheel side to side with both hands — any clunk or knock indicates excessive rack play. Drive slowly over a speed bump while holding the wheel straight and listen for a knock from below the engine bay. Have a mechanic check inner tie rod end play at the rack.

Where to look: Steering rack mounted transversely across the engine bay behind the front axle

Parts involved: Steering rack.

Ask the seller

  • “Has the steering rack or inner tie rod ends been replaced or adjusted?”
  • “Do you notice any knocking from the front when going over speed bumps?”
  • “Does the steering feel vague or have a dead spot in the centre?”

08Rear Height Control Air Suspension Compressor Failure (VX and Kakadu)

Load the rear of the vehicle and observe whether it self-levels within a few minutes.2009 onwardSuspension
OccasionalSuspension $800–$2,200 to fix

Can't confirm for this car

VX and Kakadu grade 150 series Prados fitted with rear height control air suspension use an electric compressor to inflate air springs for load levelling. The compressor is mounted in the rear wheel arch and is exposed to road wash, mud, and moisture. The compressor motor windings and check valves fail from water and dust ingress, typically at 80,000–150,000 km. Failure results in the vehicle sagging at the rear under load and inability to level when towing. Replacement compressors from Toyota dealers are expensive; aftermarket units are available but require correct calibration.

Symptoms to notice

  • Rear of vehicle sitting noticeably low when loaded or towing
  • Air suspension warning light on dashboard
  • Grinding or burning smell from the compressor area in the rear wheel arch
  • Rear levelling system not responding when towing or with load

What to check

  1. Load the rear of the vehicle and observe whether it self-levels within a few minutes.
  2. Listen in the rear wheel arch area for the compressor cycling normally.
  3. Scan for air suspension fault codes.
  4. Inspect the compressor mounting and air line connections for corrosion, water ingress, or damage.

Where to look: Rear passenger-side wheel arch — compressor unit and associated air lines; rear air springs between chassis and axle

Parts involved: Air suspension strut.

Ask the seller

  • “Does the rear height control system work correctly when loaded or towing?”
  • “Has the air suspension compressor been replaced or repaired?”
  • “Any air suspension warning lights in the service or ownership history?”

09Brake Caliper Guide Pin Seizure Causing Uneven Pad Wear and Brake Drag

2009–2022Brakes
CommonBrakes $200–$700 to fix

Can't confirm for this car

The sliding-type brake calipers on the 150 Series Prado use two steel guide pins coated with a rubber boot and lubricated with high-temperature grease to allow the caliper to float and centre itself over the rotor as the pads wear. Road grit, water ingress through degraded boots, and galvanic corrosion between the steel pin and aluminium caliper bracket cause the pins to seize, preventing the caliper from retracting fully after brake application. A seized pin keeps one brake pad in constant light contact with the rotor, causing accelerated and uneven pad wear, rotor heat distortion, brake pull under emergency braking, and in severe cases a fluid-heated brake hose failure due to residual hydraulic pressure.

Symptoms to notice

  • Vehicle pulls to one side under braking, particularly noticeable in emergency stops
  • One wheel noticeably hotter than its opposite after a normal drive
  • Brake pads worn unevenly between inner and outer on the same caliper
  • Brake drag felt as increased rolling resistance or a burning smell after extended driving

What to check

After a moderate drive, carefully place a hand near (not on) each wheel hub and compare residual heat — a seized caliper on that corner will produce noticeably more heat than the opposite side. Inspect the brake pads: uneven wear between the inner and outer pad on the same corner is the hallmark of guide pin seizure. Check the flexible brake hoses for heat-induced softening or swelling, which indicates chronic caliper drag on that corner. If a workshop inspection is possible: Remove the caliper and extract each guide pin; a seized pin will be immovable or will show corrosion-locked surfaces inside the rubber boot.

Where to look: All four corners — brake caliper guide pins within the caliper mounting bracket; particularly common on rear calipers exposed to water and mud

Parts involved: Brake disc and pads.

Ask the seller

  • “Have the brake caliper guide pins been cleaned and re-greased at the most recent brake service?”
  • “Does the vehicle pull to one side under firm braking?”
  • “Are the brake pad thicknesses even between inner and outer pads on each caliper?”

10Rear Differential Lock Actuator Failure

Engage the rear diff lock on a safe surface and confirm the amber lock indicator goes solid within a few seconds.2009–2022Suspension
OccasionalSuspension $500–$1,500 to fix

Can't confirm for this car

The rear differential lock on the KDJ150/GRJ150 uses a separate electric actuator mounted on the rear differential housing; this unit is equally susceptible to water ingress and corrosion as the front actuator but is located in a more exposed position near the rear axle. Failure prevents the rear diff lock from engaging, eliminating a key off-road recovery capability. Many failures are caused by moisture tracking along the wiring loom to the connector rather than actuator motor failure alone.

Symptoms to notice

  • Rear diff lock warning indicator flashes and never confirms engagement
  • No mechanical clunk from the rear axle when rear lock is activated
  • Diff lock works intermittently depending on temperature or recent water exposure
  • Corrosion visible at the rear axle actuator wiring connector
  • 4WD warning light on dash accompanying diff lock failure

What to check

Engage the rear diff lock on a safe surface and confirm the amber lock indicator goes solid within a few seconds. A flashing indicator means failed engagement. Inspect the rear axle actuator connector for corrosion and examine the loom along the axle for chafing or moisture entry points. Check for any 4WD-related fault codes.

Where to look: Rear differential housing — actuator mounted on the top or side of the rear axle, routed under the rear of the vehicle.

Parts involved: Differential.

Ask the seller

  • “Can you demonstrate the rear diff lock engaging with the indicator going solid, not just flashing?”
  • “Has the rear diff lock actuator wiring been inspected or resealed against moisture?”
  • “Is there any history of the vehicle being driven in salt water, tidal crossings, or beach environments?”
Fluid leaks2

011KD-FTV Injector Body Cracking — External Fuel Leak

The 1KD-FTV 3.0L diesel injector bodies develop hairline cracks in the steel body where the high-pressure fuel return banjo fitting seats.diesel2002–2015Fluid Leaks
CommonFluid Leaks $2,200–$5,500 to fix

Can't confirm for this car

The 1KD-FTV 3.0L diesel injector bodies develop hairline cracks in the steel body where the high-pressure fuel return banjo fitting seats. Fuel seeps externally at high mileage or after heat cycling, pooling on top of the engine. Shared fault pattern with HiLux, Fortuner and Land Cruiser 70/200 series using the same injection hardware. Common at 150,000–250,000 km. Fire risk if fuel contacts hot exhaust.

A single common-rail diesel fuel injector photographed against a plain background.Example of the part — not this vehicle

A common-rail diesel injector. Contamination damages the nozzle at the tip.

Panoha · CC BY-SA 3.0 · Wikimedia Commons

Symptoms to notice

  • Diesel smell inside cabin or under bonnet
  • Visible wet fuel stain on top of engine around injector bodies
  • Black sooty residue around injector body base
  • Fuel consumption increase with no performance change

What to check

  1. With engine warm, inspect the top of each injector body with a torch for fuel staining, cracking around the return banjo fitting, or wet sooty buildup.
  2. Check the high-pressure fuel rail for weeping.
  3. Run the engine and watch for fuel misting under the bonnet.

Where to look: Top of engine — individual injector bodies mounted in the cylinder head

Parts involved: Fuel injector.

Ask the seller

  • “Have the injectors ever been replaced or inspected for cracking?”
  • “Any diesel smell noticed inside the cab or under the bonnet?”
  • “Does the fuel consumption match Toyota specification?”

02Rear Differential Breather Blockage Causing Axle Seal Blowout

Locate the rear differential breather tube on top of the diff housing and trace to the routed hose — check for mud blockage at the end fitting.2002–2009Fluid Leaks
CommonFluid Leaks $300–$800 to fix

Can't confirm for this car

The rear differential breather tube on the 120 series Prado is routed high into the engine bay to prevent water ingress during water crossings. Over time the breather becomes blocked with mud or debris. When the diff heats under load and cannot vent, internal pressure forces oil past the pinion and axle seals. Vehicles used off-road are particularly susceptible. A blown axle seal contaminates the rear drum brakes, creating a secondary brake fade and safety hazard.

Symptoms to notice

  • Oil seeping from rear differential pinion or axle seal area
  • Oil spray on inside of rear wheels or brake drums
  • Reduced differential oil level on inspection
  • Differential whine or clunking if oil level runs low

What to check

  1. Locate the rear differential breather tube on top of the diff housing and trace to the routed hose — check for mud blockage at the end fitting.
  2. Inspect the pinion seal and axle seals for weeping oil.
  3. If a workshop inspection is possible: Remove the rear drums and inspect the inside of the drum and backing plate for oil contamination.

Where to look: Rear differential housing — breather tube on top of diff body, pinion seal at front of diff, axle seals at wheel ends

Parts involved: Differential.

Ask the seller

  • “Has the vehicle been used for water crossings or heavy off-road use?”
  • “When were the rear axle seals last inspected or replaced?”
  • “Has any oil been added to the rear differential?”

What these repairs cost on other cars

Some of the Toyota LC Prado’s documented faults are repairs other models share. Each page lists the documented NZ cost for every model it affects.

Other Toyota models

Toyota LC Prado buyer questions

Is the Toyota LC Prado reliable?

Like any used car, it depends on the specific example and its service history. Across the 29 documented faults for the Toyota LC Prado, the recurring problem areas are engine, fluid leaks, and cooling. A Toyota LC Prado with a full service history and no signs of the issues listed on this page can be a sound buy but each one needs to be checked individually before you commit.

What are the most common problems with a used Toyota LC Prado?

We've catalogued 29 known faults for the Toyota LC Prado, covering engine, fluid leaks, and cooling. All 29 are written out in full on this page, with the symptoms to notice, what to inspect, and typical repair costs for each. Free to read, no account needed.

How much do repairs cost on a Toyota LC Prado?

Most single repairs on the Toyota LC Prado fall between $700–$2,200 at NZ independent-workshop rates. Some of the 29 documented faults cost less and a few cost considerably more, and no one car needs them all. Knowing which ones to look for before you view is what lets you negotiate the price down or walk away.

Should I get a pre-purchase inspection on a Toyota LC Prado?

Yes. A Toyota LC Prado inspection focused on its known weak points is the single best way to avoid an expensive mistake. KickTyres gives you a guided, model-specific inspection plus a market valuation and negotiation figure for $24.90 far less than the cost of missing one of the faults on this page.