Skip to content
Toyota1990–1998 Critical issues documented

Toyota LC80: common faults & what to check

Thinking about buying a used Toyota LC80 (1990–1998) in New Zealand? We've documented 17 known faults for this model spanning engine, cooling, body & rust, and suspension. Each researched and verified before it's published. The most serious issues here are rated critical. Every one is listed below with its symptoms and repair cost, and each has its own page with where to look and what to ask the seller. Free, no account needed.
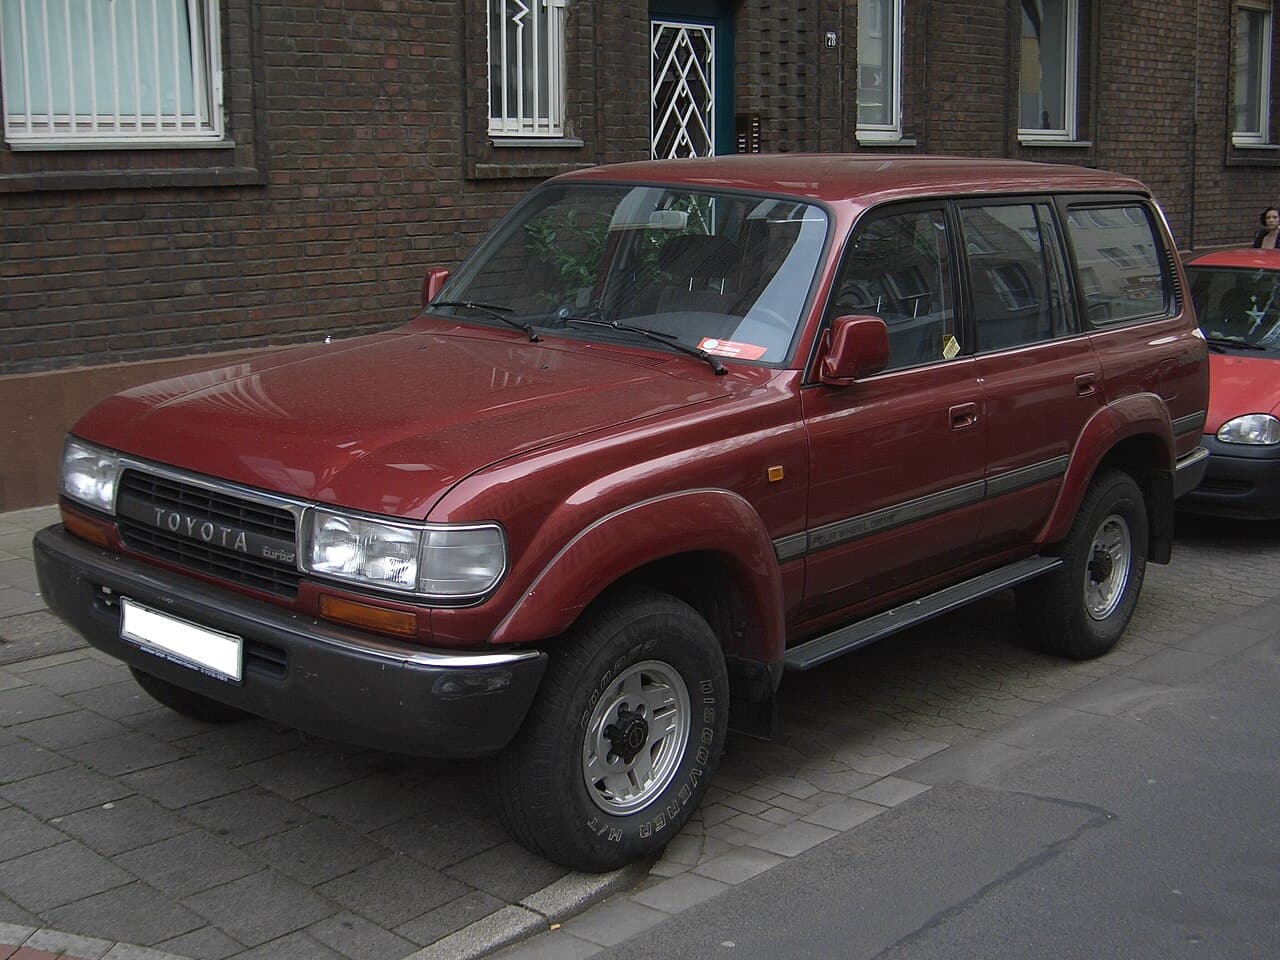
A Toyota LC80 — example photograph; the generation is not established
Toyota LC80. An example of the model — the generation is not established, and it is not the car you are looking at. Photo: Detectandpreserve via Wikimedia Commons, CC BY-SA 3.0.

Check this exact Toyota LC80

  • Odometer history
  • Money owing
  • Reported stolen
  • Ownership history
  • Official NZ vehicle register data
  • NZ owned and operated

Type the plate for the free basics. The full record is a paid check from $13.49, one car at a time, no subscription.

No NZ plate yet, or buying in Australia? Pick the generation and engine and start a free check below. New to KickTyres? How the check works →

17

Documented faults

Critical

Most serious

$900–$2,800

Typical repair

5

Systems covered

Which Toyota LC80 are you looking at?

Pick the year and the engine. The faults below narrow to that exact combination, because a 1.8 and a 2.4 of the same car do not fail the same way. Free, no account needed.

Start your free check on this Toyota LC80

No plate needed. You get the risk score, the buyer's checklist and the guided inspection for the exact car you picked above — not the whole nameplate.

Pick the engine above first: the LC80 came with 7, and without it the report has to show all of their faults. Pick the engine

Free. The paid plate check is separate, and stays optional.

Can't confirm for this car

Toyota LC80

Nothing has been narrowed yet, so nothing below is a claim about a particular car. Pick a year and an engine to see which faults apply.

Tell us the engine, or check the engine code on the car, before relying on this.

matched on no vehicle context

What to look out for

The checks worth doing on a Toyota LC80 before you hand over any money. Every documented fault is listed below, each with its own page.

  • Serious issue

    Get to the vehicle before the seller has warmed it up and put your hand on the bonnet when you arrive to be sure it is stone cold.

    See why

    1HD-FT 24-valve cylinder head cracking (pre-1998 head casting)

    The 1HD-FT is the 4.2 twenty-four-valve turbo diesel fitted to the HDJ80 from 1995, and its defining weakness is the cylinder head itself cracking — typically between cylinders or through into a valve seat. Any overheating event, and any extra heat from a turned-up injection pump or a bigger turbo, sharply raises the risk. Toyota made a running change in 1998 to a revised head casting and an updated head gasket, released under bulletin TSB-98-04, which means an 80 Series still on its original head has the casting that cracks. A cracked head pushes combustion gas into the coolant and coolant into the cylinders: you get bubbling in the overflow bottle, coolant disappearing with no puddle underneath, sweet white smoke that will not clear, and eventually a hydraulically locked engine. This is not a head-gasket-and-hope job; the head has to come off and be replaced or properly repaired, and it is the single biggest financial risk on this model.

    What you would notice

    • Steady stream of bubbles rising in the coolant overflow bottle with the engine warm and running
    • Coolant level dropping with no visible leak or puddle
    • White smoke from the exhaust that keeps coming once warm and smells sweet rather than oily
    • Temperature gauge creeping up on a long climb or while towing
    • Creamy mayonnaise-like film under the oil filler cap or on the dipstick
    • Heater blows cool because the system is full of gas

    Typically $4,500–$9,500 to put right.

  • Serious issue

    Combustion gas (CO2) sniff test on coolant overflow tank with engine at operating temperature.

    See why

    1HZ Diesel Head Gasket Failure

    The naturally aspirated 1HZ 4.2L inline-six diesel shares the same failure mode as the 1KZ-TE: cast iron block with aluminium alloy cylinder head. The gasket fails between cylinders or at a water jacket passage, typically after years of thermal cycling. The pattern is well-documented in NZ and AU, matching the same failure seen in HiAce Commuter and Coaster buses with this engine. Failure is gradual and often masked until coolant loss becomes obvious.

    What you would notice

    • Coolant consumption without visible external leak
    • White exhaust smoke on cold start clearing slowly as engine warms
    • Frothy or milky residue on oil filler cap
    • Overheating episodes particularly under load or towing
    • Air bubbles rising through coolant reservoir

    Typically $2,500–$5,000 to put right.

  • Serious issue

    Listen for chain rattle on cold start and under load.

    See why

    1FZ-FE Timing Chain Guide Rail Fracture

    The 1FZ-FE timing chain system uses three nylon guide rails that become brittle through heat cycling and oil degradation. Beyond 150,000 km the plastic fractures, with fragments falling into the oil pan or jamming the chain. A fractured guide allows chain lateral movement and whip, causing audible chain noise and progressive timing variation. In severe cases the chain jumps a sprocket tooth or derails entirely, causing immediate valve-to-piston contact and catastrophic internal engine damage. This is a well-documented failure mode in the Toyota enthusiast community.

    What you would notice

    • Chain rattle or clatter from front of engine on startup
    • Noise worsens under engine load at mid-range RPM
    • Rough idle or misfiring
    • Check engine light with camshaft or crankshaft timing correlation codes
    • Metallic plastic fragments visible in engine oil on drain
    • Sudden loss of power if chain jumps

    Typically $2,000–$5,000 to put right.

  • Serious issue

    Perform a combustion gas test (block test / CO sniffer) on the coolant reservoir.

    See why

    1FZ-FE Head Gasket Failure at High Mileage

    The 1FZ-FE 4.5L inline-six petrol engine is prone to head gasket failure, particularly on high-mileage examples or any engine that has been overheated. The cast-iron block and aluminium head have differing thermal expansion rates, and the OEM multi-layer steel gasket is marginal at the fire-ring where cylinders 4 and 5 are closest to the coolant passage. Overheating events — often caused by a failed thermostat or blocked radiator — accelerate gasket degradation. Once compromised, coolant enters combustion chambers or the oil gallery.

    What you would notice

    • White steam from exhaust on startup that does not clear after warmup
    • Coolant loss with no visible external leak
    • Milky brown sludge on underside of oil filler cap
    • Overheating gauge spike followed by rapid coolant disappearance

    Typically $2,200–$4,800 to put right.

  • Serious issue

    Inspect EGR cooler exterior for coolant staining or calcium deposits.

    See why

    1HD-FT EGR Cooler Crack and Coolant Contamination

    The 1HD-FT 4.2L turbo diesel uses an EGR cooler that is prone to internal cracking at the coolant-side heat exchanger walls. The failure mode is thermal fatigue from repeated heat-soak cycles, particularly on vehicles used for long highway runs alternated with cold soaks. When the cooler cracks, coolant leaks internally into the EGR circuit and is inducted into the intake manifold, causing hydrolock risk and severe cylinder scoring if not caught early. External coolant weep from the cooler housing is an early warning sign.

    What you would notice

    • Unexplained coolant loss with no external puddle under vehicle
    • White smoke from exhaust on a diesel that is fully warmed up
    • Coolant smell from the intake or air filter housing
    • Sudden loss of power accompanied by coolant disappearance

    Typically $1,800–$3,500 to put right.

  • Costly issue

    Closely inspect both lower corners of the rear door(s) with a torch.

    See why

    Rear Door Lower Corner Rust-Through

    The 80 Series factory rear door design traps water and debris at the lower corners where the outer skin meets the frame channel. The factory drainage holes in this area are undersized and block readily with mud and organic matter, allowing moisture to sit against bare steel. Rust progresses from inside the door cavity outward, causing bubbling paint then rust-through at the lower corners. Both single swing-out and twin barn-door configurations are equally affected across all engine variants.

    What you would notice

    • Paint bubbling at rear door lower corners
    • Visible rust-through holes at bottom edges of rear door
    • Flaking rust visible inside door cavity when door is open
    • Door skin feels soft or spongy when pressed at lower corners
    • Brown rust staining below door on body

    Typically $700–$4,000 to put right.

See all 17 documented issuesEverything researched for the Toyota LC80, including 5 rated critical.
Depends on which engine this Toyota LC80 has — 17Each of these is documented for one particular engine. Pick the year and engine above to see which of them apply.
Engine, transmission & cooling9

011HD-FT 24-valve cylinder head cracking (pre-1998 head casting)

Get to the vehicle before the seller has warmed it up and put your hand on the bonnet when you arrive to be sure it is stone cold.diesel1995–1997Engine
Read the full fault: symptoms, where to look, what to ask the seller

021HZ Diesel Head Gasket Failure

Combustion gas (CO2) sniff test on coolant overflow tank with engine at operating temperature.diesel1990–1998Engine
Read the full fault: symptoms, where to look, what to ask the seller

031FZ-FE Timing Chain Guide Rail Fracture

Listen for chain rattle on cold start and under load.petrol1992–1998Engine
Read the full fault: symptoms, where to look, what to ask the seller

041FZ-FE Head Gasket Failure at High Mileage

Perform a combustion gas test (block test / CO sniffer) on the coolant reservoir.petrol1992–1997Engine
Read the full fault: symptoms, where to look, what to ask the seller

051HD-FT EGR Cooler Crack and Coolant Contamination

Inspect EGR cooler exterior for coolant staining or calcium deposits.diesel1992–1997Cooling
Read the full fault: symptoms, where to look, what to ask the seller

061HZ Timing Chain Stretch at High Mileage

Cold-start the engine and listen carefully to the front of the engine for chain rattle in the first 5-10 seconds.diesel1990–1998Engine
OccasionalEngine $1,400–$3,200 to fix

Can't confirm for this car

The 1HZ diesel uses a duplex roller timing chain that elongates significantly beyond 250,000 km of use. Chain slack causes retarded valve timing, reducing power and increasing fuel consumption. The plastic upper chain guide and mechanical tensioner wear concurrently, compounding the slack. A distinctive metallic rattle on cold start before oil pressure builds is the primary symptom. A jumped timing chain on a diesel risks valve-to-piston contact and severe internal engine damage.

The front of a dual overhead camshaft engine with the timing cover removed, exposing the timing chain and sprockets.Example of the part — not this vehicle

The front of a twin-cam engine with the timing cover off — chain, sprockets and guides.

Logansenf · CC BY-SA 4.0 · Wikimedia Commons

Symptoms to notice

  • Metallic rattle from front of engine on cold start
  • Rattle diminishes once oil pressure builds
  • Reduced power output and throttle response
  • Increased fuel consumption
  • Rough running on acceleration

What to check

Cold-start the engine and listen carefully to the front of the engine for chain rattle in the first 5-10 seconds. Check service records for timing chain replacement history. Engines above 280,000 km without documented chain service should be treated as at risk.

Where to look: Front of engine behind the timing cover, behind the crankshaft front pulley

Parts involved: Timing chain.

Ask the seller

  • “Has the timing chain been replaced and at what mileage?”
  • “Has there ever been a cold-start rattle from the engine?”
  • “What is the full documented service history at high mileage?”

071HZ Injection Pump Governor Weight Wear

Start the engine cold and observe idle quality through warm-up.diesel1990–1998Engine
Read the full fault: symptoms, where to look, what to ask the seller

081FZ-FE Timing Chain Tensioner Rattle on Cold Start

Start the engine cold and listen carefully at the front of the engine for chain rattle.petrol1992–1997Engine
CommonEngine $900–$2,200 to fix

Can't confirm for this car

The 1FZ-FE uses a hydraulic timing chain tensioner that relies on oil pressure to maintain chain tension. At high mileage, the tensioner's non-return valve and spring weaken, allowing the oil film to drain down when the engine is stopped. On next cold start, the chain goes slack for several seconds until oil pressure builds, producing a characteristic metallic rattling from the front of the engine. Prolonged or severe slack can cause the chain to skip a tooth, resulting in valve timing errors and potential contact between valves and pistons.

The front of a dual overhead camshaft engine with the timing cover removed, exposing the timing chain and sprockets.Example of the part — not this vehicle

The front of a twin-cam engine with the timing cover off — chain, sprockets and guides.

Logansenf · CC BY-SA 4.0 · Wikimedia Commons

Symptoms to notice

  • Metallic rattling noise from front of engine for 3-10 seconds on cold start, quieting once oil pressure builds
  • Noise worsens progressively over time and begins occurring on warm restarts as tensioner deteriorates further

What to check

  1. Start the engine cold and listen carefully at the front of the engine for chain rattle.
  2. Note duration before noise ceases.
  3. Remove timing chain cover inspection plug if accessible to check chain slack.
  4. Check oil pressure at idle; low oil pressure accelerates tensioner failure.
  5. Inspect for any timing-related misfire codes if tensioner has progressed to chain skip.

Where to look: Front of engine, timing chain cover behind crank pulley

Parts involved: Timing chain.

Ask the seller

  • “Does the engine rattle on first start from cold, particularly in the morning?”
  • “Has the timing chain or tensioner ever been replaced?”
  • “What is the oil change interval and what oil grade is used?”

091FZ-FE Petrol Cooling System Plastic Component Failure

The 1FZ-FE 4.5L inline-six petrol engine uses plastic thermostat housings, plastic coolant pipe fittings, and a plastic-impeller water pump.petrol1992–1998Cooling
Read the full fault: symptoms, where to look, what to ask the seller
Body, brakes, suspension & interior6

01Rear Floor Pan and Chassis Rail Rust

Inspect the rear inner wheel arches for rust bubbling from behind the plastic arch liner.1990–1997Body & Rust
CommonBody & Rust $600–$6,500 to fix

Can't confirm for this car

The 80 Series body has known rust-prone areas in the rear floor pan (particularly under the third-row seat area and behind the rear wheel arches where mud accumulates against the inner panel), and in the main chassis rails under the body where the box-section traps moisture and debris. In New Zealand and Australian coastal markets, salt-laden air combined with off-road mud packing accelerates this corrosion. In severe cases, structural chassis rail integrity is compromised, which affects tow rating legality and structural safety. Rust-through in the rear floor pan also allows exhaust fumes to enter the cabin.

Symptoms to notice

  • Bubbling or flaking paint on the rear floor visible when the third-row seat is folded or removed, with soft or holed metal beneath
  • Visible rust perforation or heavy surface scale on the chassis rails when inspected from beneath the vehicle

What to check

  1. Inspect the rear inner wheel arches for rust bubbling from behind the plastic arch liner.
  2. Check the outriggers where the body mounts to the chassis.
  3. If a workshop inspection is possible: Lift the rear cargo floor mat and third-row seat base and probe the floor pan with a screwdriver for soft spots.
  4. Put the vehicle on a hoist and inspect the chassis rails from the rear axle forward using a light and a screwdriver or pick to probe any scaled areas.

Where to look: Rear floor pan under third-row seat; inner rear wheel arch panels; main chassis rails outboard of the gearbox crossmember rearward

Parts involved: Chassis and structural rust.

Ask the seller

  • “Has the vehicle been used near the coast or on gravel roads with salt chip?”
  • “When was the underside last treated with rust proofing or underseal?”
  • “Has the rear floor ever been repaired or has any rust treatment been applied to the chassis rails?”

02Rear Door Lower Corner Rust-Through

Closely inspect both lower corners of the rear door(s) with a torch.1990–1998Body & Rust
Read the full fault: symptoms, where to look, what to ask the seller

03Recirculating Ball Steering Box Worn Sector Shaft Splines

With the engine off, rock the steering wheel firmly left and right through the straight-ahead position and feel for a dead zone or clunk.1990–1997Suspension
OccasionalSuspension $900–$2,800 to fix

Can't confirm for this car

The 80 Series uses a recirculating ball hydraulic steering box, and the sector shaft — the output shaft that connects to the drag link — develops worn splines at the pitman arm interface on high-mileage or hard-used vehicles. The splines are a tapered interference fit, and repeated high steering loads (common in off-road use) cause the pitman arm to work on the splines. Once the splines are worn, the pitman arm has rotational play relative to the shaft, producing a dead spot on centre and a clunking or knocking sensation through the steering wheel when changing direction. The steering box itself can also develop internal wear, resulting in vague on-centre feel.

Symptoms to notice

  • Clunk or knock felt through the steering wheel and floor when moving the wheel from lock back toward centre at low speed
  • Excessive free play at the steering wheel rim before the front wheels begin to respond, particularly noticeable on straight-ahead driving

What to check

With the engine off, rock the steering wheel firmly left and right through the straight-ahead position and feel for a dead zone or clunk. Have an assistant watch the pitman arm while you do this — visible movement of the pitman arm before the sector shaft moves confirms worn splines. Inspect the pitman arm-to-sector shaft interface for rust weeping from the taper joint. A steering box adjuster screw may partially mask wear; check whether it has been wound in as far as it will go.

Where to look: Steering box mounted on left chassis rail, sector shaft and pitman arm at bottom of box

Ask the seller

  • “Is there any vagueness or dead spot in the steering around the straight-ahead position?”
  • “Has the steering box ever been overhauled or replaced?”
  • “Has the vehicle been used for serious off-road driving with repeated high steering loads?”

04Front Axle Birfield Joint Wear and Failure

Drive the vehicle in a tight circle at low speed in both directions and listen for clicking from each front corner.1990–1997Suspension
OccasionalSuspension $700–$2,000 to fix

Can't confirm for this car

The 80 Series uses full-time four-wheel drive with Birfield (constant-velocity) joints in the front axle shafts inside the sealed knuckle housing. These joints are packed with grease at the factory and are designed as high-load components, but the grease degrades over time and the ball and groove surfaces wear, particularly on vehicles used regularly with the centre diff locked or driven aggressively off-road. Once worn, the joint produces audible clicking or grinding under steering lock and on take-off, and can ultimately seize or shed balls, leaving the driver without front drive on one or both sides.

Symptoms to notice

  • Clicking or clunking noise from one or both front wheels during cornering or when turning on full lock while driving slowly
  • Grinding or rumbling from the front axle under power, particularly noticeable when pulling away from a standstill with steering turned

What to check

  1. Drive the vehicle in a tight circle at low speed in both directions and listen for clicking from each front corner.
  2. Inspect the front knuckle housing for grease leakage from the swivel hub seal — dry or leaking hubs indicate the grease has not been maintained.
  3. Have a workshop drain and inspect the knuckle housing grease for metal particles.

Where to look: Front axle shafts inside steering knuckle housing, left and right

Parts involved: Differential.

Ask the seller

  • “When were the front knuckle housings last serviced with fresh grease?”
  • “Does the vehicle click from the front when cornering tightly?”
  • “Has the vehicle been used regularly in 4WD low with the centre diff locked?”

05Rear Coil Spring Cracking Under Load

With the vehicle on a flat surface, compare ride height side-to-side at the rear.1990–1997Suspension
CommonSuspension $400–$950 to fix

Can't confirm for this car

The 80 Series moved to rear coil springs over the leaf-sprung 60 Series, and the OEM springs are prone to cracking at the lower coil seat area on vehicles that have been heavily loaded (towing, roof racks, aftermarket accessories, overlanding) or have high mileage. The spring steel fatigues at the point of maximum stress concentration where the coil contacts the rubber isolator on the axle perch. A cracked spring can partially collapse, giving a sudden drop in ride height on one corner, and shed metal fragments that damage the spring perch or puncture the tyre in severe cases.

Symptoms to notice

  • Visible crack or break in one of the lower coils, often with rust bleeding from the fracture point
  • One corner of the vehicle sitting noticeably lower than the other side when inspected on level ground

What to check

With the vehicle on a flat surface, compare ride height side-to-side at the rear. Look for rust streaking originating from a point on the coil rather than surface rust across the whole spring. If a workshop inspection is possible: Jack the rear and remove the wheels; visually inspect each coil from the bottom up for cracks, paying particular attention to the first and second coil from the base.

Where to look: Rear suspension, lower coil spring seat on both left and right axle perches

Ask the seller

  • “Has the vehicle been used for regular towing or carried heavy loads such as a rooftop tent and full camping gear?”
  • “Have the rear springs ever been replaced or have aftermarket springs been fitted?”
  • “Is the ride height even side-to-side at the rear?”

06Front Sway Bar Bushing and End-Link Wear

Inspect for cracked, flattened, or missing rubber.1990–1998Suspension
Very commonSuspension $150–$450 to fix

Can't confirm for this car

The 80-series front sway bar rubber bushings and end links deteriorate from age and off-road use. The rubber in the centre cradle bushings cracks and collapses, and the end links develop play or seize. While not catastrophic, this produces handling vagueness and a rolling, loose feel on corners that is commonly misdiagnosed as shock absorber or steering wear. Replacement is inexpensive and often neglected on working 4WDs.

Symptoms to notice

  • Clunking or knocking from front suspension on slow-speed bumps and dips
  • Excessive body roll through corners
  • Loose or vague front-end feel
  • Visible cracking or deformation of sway bar bushings

What to check

Inspect for cracked, flattened, or missing rubber. Grasp the bar and attempt to move it laterally - any slop indicates worn bushings. If a workshop inspection is possible: With vehicle on a hoist or flat ground, locate the front sway bar centre bushings in the cradle brackets and the end links connecting to the lower control arms.

Where to look: Front sway bar: centre cradle bushings under front cross-member, and end links at lower control arms each side

Parts involved: Shock absorber / strut.

Ask the seller

  • “Have the front sway bar bushings been replaced?”
  • “Has the vehicle been used off-road regularly?”
Fluid leaks2

01Front Diff Stub Axle Oil Seal Failure

Check for an oil film on the stub axle shaft behind the birfield joint.1990–1998Fluid Leaks
Read the full fault: symptoms, where to look, what to ask the seller

02Differential and Axle Shaft Seal Weeping

Check the rear diff housing at both axle exits and at the pinion flange for weeping.1990–1997Fluid Leaks
Very commonFluid Leaks $180–$650 to fix

Can't confirm for this car

Both the front and rear differentials on the 80 Series are known to develop weeping oil seals at the axle shaft exits as the nitrile seal lips harden with age and heat cycling. The rear differential pinion seal is also a common weep point. Seal failure is accelerated on vehicles that have been submerged during off-road use, as water intrusion degrades the seal lip. Diff oil loss leads to premature bearing and crown-wheel-and-pinion wear; on the front axle, leaking diff oil can migrate into the brake drum or disc area and contaminate brake friction material.

Symptoms to notice

  • Oily residue or dried diff oil caking around the wheel hub flanges at the inner edge behind the wheel
  • Differential oil level consistently low when checked, with no obvious puddle on the ground but wet streaking down the housing

What to check

Check the rear diff housing at both axle exits and at the pinion flange for weeping. Check diff oil levels at both front and rear. On the front, inspect the inboard face of the front brake rotor or drum for oil contamination. If a workshop inspection is possible: Remove wheels and inspect inside of each wheel rim and hub flange for oily film or dried gear oil residue.

Where to look: Rear differential axle shaft seals at both ends of the housing; front differential output shaft seal; rear pinion seal

Parts involved: Differential.

Ask the seller

  • “When were the differential oils last changed and were the seals inspected at that time?”
  • “Has the vehicle been through water crossings? If so, were the diffs re-oiled afterwards?”
  • “Is there any oily residue around the wheel hub flanges?”

Toyota LC80 faults in detail

Each of these has its own page: the symptoms, where to look, what to ask the seller and what the repair costs. Free, no account needed.

What these repairs cost on other cars

Some of the Toyota LC80’s documented faults are repairs other models share. Each page lists the documented NZ cost for every model it affects.

Other Toyota models

Toyota LC80 buyer questions

Is the Toyota LC80 reliable?

Like any used car, it depends on the specific example and its service history. Across the 17 documented faults for the Toyota LC80, the recurring problem areas are engine, cooling, and body & rust. A Toyota LC80 with a full service history and no signs of the issues listed on this page can be a sound buy but each one needs to be checked individually before you commit.

What are the most common problems with a used Toyota LC80?

We've catalogued 17 known faults for the Toyota LC80, covering engine, cooling, and body & rust. All 17 are written out in full on this page, with the symptoms to notice, what to inspect, and typical repair costs for each. Free to read, no account needed.

How much do repairs cost on a Toyota LC80?

Most single repairs on the Toyota LC80 fall between $900–$2,800 at NZ independent-workshop rates. Some of the 17 documented faults cost less and a few cost considerably more, and no one car needs them all. Knowing which ones to look for before you view is what lets you negotiate the price down or walk away.

Should I get a pre-purchase inspection on a Toyota LC80?

Yes. A Toyota LC80 inspection focused on its known weak points is the single best way to avoid an expensive mistake. KickTyres gives you a guided, model-specific inspection plus a market valuation and negotiation figure for $24.90 far less than the cost of missing one of the faults on this page.