 2000–2007E120E1201.5L petrol (1NZ-FE)PetrolSee faults & what to checkKickTyres illustration, not a photograph.
Toyota1983–2023 Critical issues documented
Toyota Runx: common faults & what to check
Thinking about buying a used Toyota Runx (1983–2023) in New Zealand? We've documented 44 known faults for this model spanning engine, body & rust, cooling, and electrical. Each researched and verified before it's published. The most serious issues here are rated critical. Every one is listed below with its symptoms and repair cost, and each has its own page with where to look and what to ask the seller. Free, no account needed.
Check this exact Toyota Runx
- Odometer history
- Money owing
- Reported stolen
- Ownership history
44
Critical
$400–$1,800
8
Which Toyota Runx are you looking at?
Petrol
2000–2007E120E1201.5L petrol (1NZ-FE)PetrolSee faults & what to checkKickTyres illustration, not a photograph.2000–2007E120E1201.8L petrol (1ZZ-FE)PetrolSee faults & what to checkKickTyres illustration, not a photograph.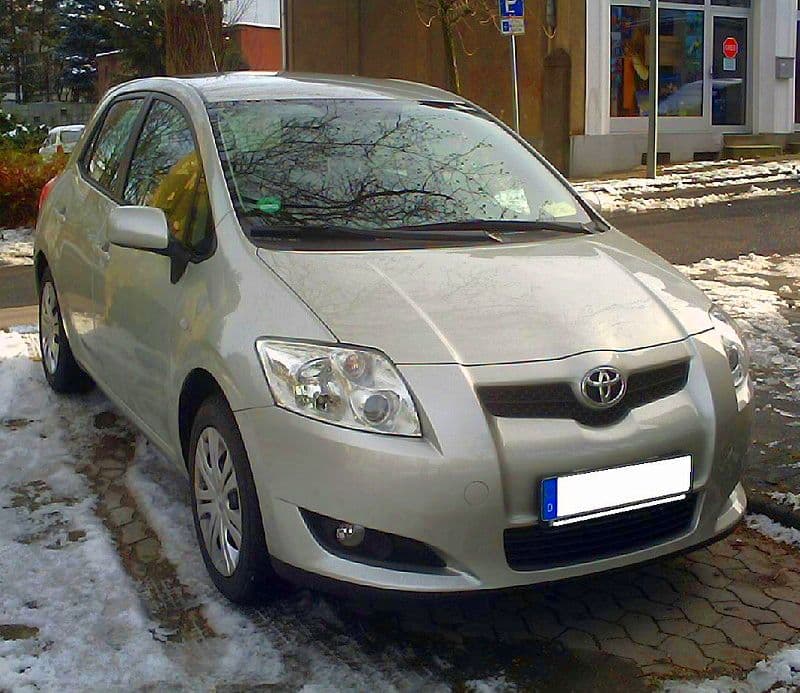 2007–2012E140E1401.5L petrol (1NZ-FE)PetrolSee faults & what to checkPhoto: M 93 via Wikimedia Commons, CC BY-SA 3.0.2007–2012E140E1401.8L petrol (2ZR-FE)PetrolSee faults & what to checkPhoto: M 93 via Wikimedia Commons, CC BY-SA 3.0.2007–2012E140E1402.0 petrolPetrolSee faults & what to checkPhoto: M 93 via Wikimedia Commons, CC BY-SA 3.0.
 2012–2018E170E1701.5 petrolPetrolSee faults & what to checkKickTyres illustration, not a photograph.2012–2018E170E1701.8L petrol (2ZR-FAE)PetrolSee faults & what to checkKickTyres illustration, not a photograph.
 2018–nowE210E2101.2L petrol (8NR-FTS)PetrolSee faults & what to checkKickTyres illustration, not a photograph.2018–nowE210E2102.0L petrol (M20A-FKS)PetrolSee faults & what to checkKickTyres illustration, not a photograph.
Hybrid
2012–2018E170E1701.5 hybridHybridSee faults & what to checkKickTyres illustration, not a photograph.2018–nowE210E2101.8 hybridHybridSee faults & what to checkKickTyres illustration, not a photograph.Engine not documented
 1983–1987E80E80Engine not documented for this generationEngine not documentedSee faults & what to checkKickTyres illustration, not a photograph.
 1987–1992E90E90Engine not documented for this generationEngine not documentedSee faults & what to checkKickTyres illustration, not a photograph.
 1991–1995E100E100Engine not documented for this generationEngine not documentedSee faults & what to checkKickTyres illustration, not a photograph.
 1995–2002E110E110Engine not documented for this generationEngine not documentedSee faults & what to checkKickTyres illustration, not a photograph.
Now narrow it to the engine
1.2L petrol (8NR-FTS)· 1.2 litre petrol1.5L petrol (1NZ-FE)· 1.5 litre petrol1.6L petrol (1ZR-FE)· 1.6 litre petrol1.8L petrol (1ZZ-FE)· 1.8 litre petrol1.8L petrol (2ZR-FAE)· 1.8 litre petrol1.8L petrol (2ZR-FE)· 1.8 litre petrol1.8L petrol (2ZZ-GE)· 1.8 litre petrol2.0L petrol (M20A-FKS)· 2.0 litre petrol
Start your free check on this Toyota Runx
Toyota RunxEngine not picked yet
Pick the engine above first: the Runx came with 8, and without it the report has to show all of their faults. Pick the engine
Can't confirm for this car
Toyota Runx
Nothing has been narrowed yet, so nothing below is a claim about a particular car. Pick a year and an engine to see which faults apply.
Tell us the engine, or check the engine code on the car, before relying on this.
matched on no vehicle context
What to look out for
Serious issue
With engine warm, briefly rev to the VVTL crossover point (around 6200 rpm) and listen for a sudden rattle, loss of power, or misfire.
2ZZ-GE VVTL-i Valve Lifter Failure at High RPM
The 2ZZ-GE engine fitted to ZZE123 models uses a two-stage variable valve lift system (VVTL-i) that engages a secondary high-lift rocker at approximately 6200 rpm. The high-lift finger follower pins and their associated oil passages can become starved of lubrication — particularly in engines with deferred oil changes or low oil level — causing the lifter pins to seize or shatter when the VVTL system attempts to engage. The resulting mechanical failure destroys cam lobes, rocker arms, and valve stems, and frequently drops debris into the oil sump, requiring full engine replacement or an expensive rebuild.
What you would notice
Serious issue
Check dipstick for dark, thick, or gritty oil.
1ZZ-FE VVT-i Oil Sludge Gallery Blockage
The 1ZZ-FE VVT-i system routes pressurised engine oil through narrow galleries to advance and retard the inlet camshaft via a solenoid-operated oil control valve (OCV). When oil degradation occurs from extended change intervals or thermal cycling without adequate oil changes, oxidised oil forms lacquer and sludge deposits that accumulate in the oil pan, cylinder head galleries, and OCV filter screen. Once the OCV screen is blocked, oil pressure to the VVT-i actuator drops, causing the actuator to stick in a fixed position. This triggers P0010 or P0011 diagnostic codes and rough running. In severe sludge cases the oil pump pickup screen also becomes restricted, starving the main and rod bearings of lubrication and causing catastrophic bottom-end failure. The problem is significantly worsened by the engine's inherent oil consumption issues masking sludge development.
What you would notice
Serious issue
Lift all carpets and mats and probe floor pan metal with a screwdriver.
Sill and Floor Pan Rust (Coastal / NZ Conditions)
AE-series Corollas are prone to structural rust along the inner and outer sills and rear floor pan sections, particularly in NZ coastal areas and the Waikato/Northland regions where road salt and humidity accelerate corrosion. Inner sill rot can be hidden under carpets, seam sealer and factory undercoat, making visual inspection unreliable. Rust here is a WOF failure point and may require major panel fabrication to repair properly. Patch repairs that hide deeper rot are widespread on older examples.
What you would notice
Serious issue
Check water pump for weeping (typically changed simultaneously).
4A-GE / 4A-FE Timing Belt Failure (Interference Engine)
The 4A-GE (twin-cam) and 4A-FE (single-cam) engines fitted to AE86, AE92 and AE101 Corollas are interference designs. Timing belt failure causes immediate valve-to-piston contact and bent valves or worse. Toyota's recommended interval was 80,000 km but belt condition on aged NZ/AU examples is frequently unknown. JDM imports often arrive with undocumented service history, making replacement a near-mandatory pre-purchase item.
What you would notice
Serious issue
Grasp the tyre at 6 and 12 o'clock and rock it vertically — any detectable play indicates ball joint wear.
Front Lower Control Arm Ball Joint Wear
The front lower control arm on ZZE122 and ZRE142 Corollas uses a press-fit or bolt-in ball joint that experiences accelerated wear when operated on unsealed roads or when protective dust boots split and allow contamination. Worn ball joints introduce vertical play in the suspension geometry, degrading steering precision and alignment stability. Ball joint failure is a critical safety defect — complete separation of the joint causes immediate loss of wheel control and vehicle collapse onto the road surface.
What you would notice
Serious issue
Check coolant level in the expansion tank — a dropping level with no external leak suggests internal pump seal failure.
2ZR-FE Internal Water Pump Bearing and Seal Failure
The 2ZR-FE engine uses a chain-driven internal water pump mounted inside the timing chain cover rather than an externally belt-driven unit. This design means pump failure produces no external belt noise warning. The pump impeller and bearing assembly can wear or the internal seal can fail, causing coolant contamination into the engine oil or loss of coolant circulation leading to overheating. Because the pump is internal, diagnosis requires timing cover removal and the repair is significantly more labour-intensive than a conventional external pump replacement. Toyota issued revised pump part numbers with updated seal specifications.
What you would notice
Toyota Runx service schedule
Toyota RunX (E120) - 1.5L FWD · 2001–2006 · 1.5L 1NZ-FE
Due by distance
- 150,000 km
Flush the cooling system and check the accessory drive belts.
- 200,000 km
Good time to check the suspension bushings and shock absorbers for perishing.
- 250,000 km
Review the alternator and starter motor, which usually need attention by this stage.
Toyota RunX (E120) - 1.8L FWD · 2001–2006 · 1.8L 1ZZ-FE
Due by distance
- 150,000 km
Check the serpentine belt and the cooling system hoses for brittleness.
- 200,000 km
Make sure the suspension parts, the shocks and bushings, have been assessed for wear.
Toyota RunX (E120) - 1.8L AWD · 2001–2006 · 1.8L 1ZZ-FE
Due by distance
- 150,000 km
Flush the coolant and check every rubber radiator hose for perishing.
- 200,000 km
Check the suspension bushings and struts, which commonly wear out by this stage of an E120's life.
- 250,000 km
Watch for slight oil seeps around the valve cover gasket or timing chain cover, common on higher-mileage Toyotas.
See all 44 documented issues
Depends on which engine this Toyota Runx has — 44
Engine, transmission & cooling
012ZZ-GE VVTL-i Valve Lifter Failure at High RPM
Can't confirm for this car021ZZ-FE VVT-i Oil Sludge Gallery Blockage
Can't confirm for this car
CommonEngine $500–$5,000 to fix
Can't confirm for this car
The 1ZZ-FE VVT-i system routes pressurised engine oil through narrow galleries to advance and retard the inlet camshaft via a solenoid-operated oil control valve (OCV). When oil degradation occurs from extended change intervals or thermal cycling without adequate oil changes, oxidised oil forms lacquer and sludge deposits that accumulate in the oil pan, cylinder head galleries, and OCV filter screen. Once the OCV screen is blocked, oil pressure to the VVT-i actuator drops, causing the actuator to stick in a fixed position. This triggers P0010 or P0011 diagnostic codes and rough running. In severe sludge cases the oil pump pickup screen also becomes restricted, starving the main and rod bearings of lubrication and causing catastrophic bottom-end failure. The problem is significantly worsened by the engine's inherent oil consumption issues masking sludge development.
Symptoms to notice
What to check
Ask the seller
032ZR-FE Internal Water Pump Bearing and Seal Failure
Can't confirm for this car
OccasionalCooling $900–$2,500 to fix
Can't confirm for this car
The 2ZR-FE engine uses a chain-driven internal water pump mounted inside the timing chain cover rather than an externally belt-driven unit. This design means pump failure produces no external belt noise warning. The pump impeller and bearing assembly can wear or the internal seal can fail, causing coolant contamination into the engine oil or loss of coolant circulation leading to overheating. Because the pump is internal, diagnosis requires timing cover removal and the repair is significantly more labour-intensive than a conventional external pump replacement. Toyota issued revised pump part numbers with updated seal specifications.
Symptoms to notice
What to check
Ask the seller
042ZR-FE Timing Chain Tensioner and Guide Rattle
Can't confirm for this car
OccasionalEngine $900–$2,200 to fix
Can't confirm for this car
The 2ZR-FE engine fitted to ZE141 and ZE172 Corollas uses a timing chain rather than a belt. The plastic chain guide rails and hydraulic tensioner are known to wear, particularly when oil changes are infrequent or when thin low-quality oil is used. A worn tensioner cannot maintain adequate chain tension, allowing the chain to rattle against the guides and timing cover on cold start. Prolonged neglect can result in chain skip, which causes catastrophic valve-to-piston contact in this interference engine. Toyota issued revised tensioner part numbers and plastic guide specifications.
 Example of the part — not this vehicle
The front of a twin-cam engine with the timing cover off — chain, sprockets and guides.
Symptoms to notice
What to check
Ask the seller
058NR-FTS Turbocharged Water Pump Seal Premature Failure
Can't confirm for this car
OccasionalCooling $600–$2,000 to fix
Can't confirm for this car
The 8NR-FTS 1.2-litre four-cylinder turbocharged engine uses a belt-driven mechanical water pump with a conventional shaft seal and bearing assembly. The pump operates under elevated thermal and pressure stress relative to naturally aspirated equivalents because turbocharging raises both coolant operating temperature and pressure cycling frequency. The mechanical shaft seal between the pump body and impeller housing is particularly susceptible to degradation when coolant is not renewed at the 2-year or 40,000km interval. Aged coolant loses its corrosion inhibitor package, promoting electrolytic corrosion of the aluminium pump housing and accelerating seal lip wear. Early failure manifests as seepage from the pump weep hole. If the seal fails completely the bearing loses its lubrication path and collapses, resulting in complete loss of coolant circulation and rapid engine overheating. Engine overheating on the 8NR-FTS can cause head gasket failure in a single sustained event.
Symptoms to notice
What to check
Ask the seller
064A-GE / 4A-FE Timing Belt Failure (Interference Engine)
Can't confirm for this car
CommonEngine $400–$900 to fix
Can't confirm for this car
The 4A-GE (twin-cam) and 4A-FE (single-cam) engines fitted to AE86, AE92 and AE101 Corollas are interference designs. Timing belt failure causes immediate valve-to-piston contact and bent valves or worse. Toyota's recommended interval was 80,000 km but belt condition on aged NZ/AU examples is frequently unknown. JDM imports often arrive with undocumented service history, making replacement a near-mandatory pre-purchase item.
Symptoms to notice
What to check
Ask the seller
07CVT (K310 / K313) Belt Judder Under Light Load
Can't confirm for this car
CommonTransmission $250–$7,500 to fix
Can't confirm for this car
The K310 and K313 CVT units fitted to NZE141 and some ZRE142 Corollas rely on a steel push-belt running between variable-diameter pulleys, with belt clamping force controlled by hydraulic pressure. Degraded CVT fluid loses its friction-modifying properties, causing micro-slip between the belt and pulley faces under light throttle loads. The resulting judder is progressive — early-stage judder can be eliminated by a CVT fluid flush, but if ignored, the pulley faces develop wear grooves and the belt stretches, requiring transmission overhaul or replacement.
Symptoms to notice
What to check
Ask the seller
08K111 CVT Steel Belt Wear and Low-Speed Judder
Can't confirm for this car
CommonTransmission $2,500–$6,000 to fix
Can't confirm for this car
ZE141 Corollas sold with the Continuously Variable Transmission (Toyota K111 unit, badged Multidrive S) can develop premature steel belt and pulley wear. The steel push-belt relies on precise pulley clamping pressure; when the belt wears or the hydraulic control valve body degrades, the belt slips micro-incrementally causing a shudder under light acceleration from low speeds (10–40 km/h). CVT fluid degradation accelerates the condition significantly. Replacement of the belt-pulley assembly or full unit exchange is expensive. Toyota NZ did extend warranty coverage on some units following a pattern of complaints.
Symptoms to notice
What to check
Ask the seller
09CVT Belt Judder on Light Throttle at Low Speed
Can't confirm for this car
CommonTransmission $200–$5,800 to fix
Can't confirm for this car
The Multidrive S CVT (K311 transaxle unit) fitted to the ZRE172 develops a characteristic shudder or judder sensation during light-throttle acceleration from low speeds, typically between 20 and 60 km/h. The steel push-belt and pulley contact surfaces develop micro-pitting and glazing from degraded or incorrect CVT fluid, causing torque converter lockup shudder that transmits through the drivetrain as a rhythmic vibration in the floor and seat. The symptom is most pronounced in urban stop-start driving and often disappears under firm throttle input. Condition worsens progressively when CVT fluid is overdue for service or if non-genuine fluid has been used. A fluid flush with genuine Toyota CVTF-TC fluid resolves early-stage cases, but advanced belt glazing requires complete transaxle rebuild or replacement.
Symptoms to notice
What to check
Ask the seller
101ZZ-FE Excessive Engine Oil Consumption from Thin Piston Ring Design
Can't confirm for this car
Very commonEngine $2,200–$5,500 to fix
Can't confirm for this car
The 1ZZ-FE engine was designed with narrower, low-tension piston rings to reduce internal friction and improve fuel economy. In practice, these rings wear rapidly and lose their ability to seal oil from the combustion chamber. Affected engines can consume 1 litre of oil per 1,000 km or more. Toyota acknowledged the issue through multiple TSBs and ultimately faced class action litigation in the US and Australia. The root cause is the ring pack geometry and groove clearance, not operator neglect. Engine rebuilds require oversized rings or a short engine replacement.
Symptoms to notice
What to check
Ask the seller
111NZ-FE Excessive Oil Consumption from Piston Ring Wear
Can't confirm for this car12K112 CVT Belt Judder on Acceleration
Can't confirm for this car
Very commonTransmission $600–$3,500 to fix
Can't confirm for this car
The E140/E150 Corolla K112 CVT develops shudder from belt and pulley cone surface wear. Urban short-trip use without sustained highway driving accelerates belt degradation. Toyota CVTF FE specification is essential.
Symptoms to notice
What to check
Ask the seller
13M20A-FKS Timing Chain Cold-Start Rattle
Can't confirm for this car14Automatic Transmission Solenoid Degradation (U340E / U341E)
Can't confirm for this car
CommonTransmission $600–$2,500 to fix
Can't confirm for this car
The U340E and U341E four-speed automatic gearboxes fitted to ZZE122 Corollas develop solenoid valve degradation with age and poor service history. Shift quality degrades noticeably — the car may refuse to upshift promptly, slip briefly between gears, or engage drive with a clunk. Fluid service is often neglected on these transmissions; degraded fluid accelerates solenoid wear. In many cases a fluid change and solenoid replacement restores normal function, but transmissions that have been run on degraded fluid for long periods may need a rebuild.
Symptoms to notice
What to check
Ask the seller
152ZR-FAE Valvematic Actuator Motor Failure
Can't confirm for this car
CommonEngine $900–$2,200 to fix
Can't confirm for this car
The 2ZR-FAE engine uses Toyota's Valvematic system, a continuously variable intake valve lift mechanism controlled by an electric actuator motor driving a worm gear assembly. The actuator's internal worm gear and motor brushes wear, causing the ECU to lose positional control of the intake valve lift — the engine defaults to a fixed-lift limp mode or triggers a misfire condition. Because the actuator is embedded in the valve cover assembly and requires significant disassembly, labour costs are substantial relative to part cost.
Symptoms to notice
What to check
Ask the seller
16Catalytic Converter Failure Secondary to Oil Burning (1ZZ-FE)
Can't confirm for this car
CommonEngine $800–$2,200 to fix
Can't confirm for this car
ZZE122 Corollas with unrepaired 1ZZ-FE oil consumption frequently present with a destroyed catalytic converter as a secondary failure. Burnt engine oil coats and poisons the catalyst substrate, causing it to melt or block internally. A blocked cat restricts exhaust flow and can cause engine power loss, overheating and further damage. Replacement cats on these cars are expensive, and fitting a new cat without fixing the underlying oil consumption will repeat the failure. Often diagnosed when the vehicle fails an emissions test or triggers a P0420 code.
Symptoms to notice
What to check
Ask the seller
17Valvematic VVT Actuator Failure - Rough Idle P0011
Can't confirm for this car
CommonEngine $800–$1,900 to fix
Can't confirm for this car
The 2ZR-FAE engine's Valvematic continuously variable valve lift actuator motor degrades over time, causing the system to lose accurate position control of the intake valve lift. Symptoms emerge progressively, beginning with subtle rough idle at operating temperature and escalating to hesitation on acceleration, check engine light with P0011 or P0012 OBD codes, and in advanced cases intermittent stalling. The actuator worm gear and motor brushes wear internally, and the wiring harness connector at the actuator is prone to heat-induced brittleness causing intermittent open-circuit faults. Toyota issued technical guidance in AU and NZ markets following elevated incidence rates post-100,000 km. Actuator replacement is the primary remedy; harness inspection is essential at the same time.
Symptoms to notice
What to check
Ask the seller
18U340E/U341E Automatic Transmission Torque Converter Shudder
Can't confirm for this car
CommonTransmission $150–$1,800 to fix
Can't confirm for this car
ZE121 Corollas fitted with the U340E or U341E four-speed automatic transmission commonly develop torque converter clutch (TCC) shudder. The condition occurs when the lock-up clutch engages at cruise speeds (typically 60–90 km/h) and the friction material inside the converter degrades, causing vibration through the drivetrain instead of smooth engagement. Toyota issued a service bulletin prescribing a full ATF drain-and-fill using Toyota WS (World Standard) fluid, which contains friction modifiers that temporarily restore clutch feel. Severe cases require converter replacement.
 Example of the part — not this vehicle
A torque converter, sectioned. The lock-up clutch inside is what shudders.
Symptoms to notice
What to check
Ask the seller
191ZR-FE Valvematic VVTL Actuator Failure
Can't confirm for this car
CommonEngine $500–$1,800 to fix
Can't confirm for this car
The 1ZR-FE 1.6 Valvematic variable valve lift actuator motor can develop a fault causing the engine management system to set a Valvematic-related fault code and resort to a fixed valve lift setting, resulting in rough idle and reduced performance. The actuator motor wears internally and can develop a position sensor fault from degraded motor brushes.
Symptoms to notice
What to check
Ask the seller
201ZZ-FE / 1NZ-FE Timing Chain Tensioner Bleed-Down Rattle
Can't confirm for this car
CommonEngine $350–$1,600 to fix
Can't confirm for this car
Both the 1ZZ-FE and 1NZ-FE engines use a hydraulic timing chain tensioner that relies on engine oil pressure to maintain chain tension. When the tensioner's internal check valve or oil feed passage degrades, oil drains back while the engine is off, causing the tensioner to lose pressure. On startup, the slack chain rattles against the timing chain guide and cover until oil pressure is restored — a period that can last several seconds. Prolonged operation with a worn tensioner risks guide failure and timing chain jump, which causes immediate engine damage.
Example of the part — not this vehicleThe front of a twin-cam engine with the timing cover off — chain, sprockets and guides.
Symptoms to notice
What to check
Ask the seller
212ZR-FE GDI Intake Valve Carbon Deposit Fouling
Can't confirm for this car22K120 CVT Belt Shudder at Cruise Speeds
Can't confirm for this car231ZZ-FE VVT-i Actuator Gear Rattle on Cold Start
Can't confirm for this car
CommonEngine $380–$900 to fix
Can't confirm for this car
The variable valve timing actuator (VVT-i gear) on the 1ZZ-FE intake camshaft uses an oil-pressure-fed helical gear mechanism. When the engine is cold, oil pressure takes several seconds to reach the actuator. In worn or high-mileage units the locking pin inside the actuator fails to hold the gear stationary during this period, producing a loud metallic rattle from the top of the engine for 2–5 seconds after startup. Prolonged failure accelerates camshaft and actuator wear. Toyota issued a service bulletin addressing the procedure and the revised actuator part number.
Symptoms to notice
What to check
Ask the seller
24M20A-FKS Direct Injection Carbon Buildup on Intake Valves
Can't confirm for this car
OccasionalEngine $450–$1,400 to fix
Can't confirm for this car
The M20A-FKS 2.0-litre engine uses direct fuel injection, in which fuel is injected directly into the combustion chamber rather than past the intake valves. Because the injectors do not wash the back faces of the intake valves with fuel, oil vapour from the positive crankcase ventilation system deposits carbonaceous buildup on the valve stems and the back of the valve heads. On port-injection engines this buildup is washed away continuously by fuel, but on the M20A-FKS it accumulates over 50,000–100,000 km, gradually restricting intake airflow, causing rough idle, hard starting, and increased fuel consumption. The E210 M20A-FKS does incorporate both DI and port injectors (D-4ST system) which partially mitigates — but does not eliminate — this well-documented failure pattern.
Symptoms to notice
What to check
Ask the seller
25Throttle Body Carbon Fouling Causing Idle and Drivability Issues
Can't confirm for this car
Very commonEngine $150–$450 to fix
Can't confirm for this car
The 1NZ-FE and 2ZZ-GE engines use an electronically controlled throttle body (drive-by-wire) that is subject to progressive carbon deposit buildup on the throttle plate and bore walls. This fouling occurs because blow-by gases from the PCV system are routed into the intake upstream of the throttle, depositing oil vapour and combustion particles on the throttle plate over time. As deposits accumulate they reduce effective throttle bore diameter, disrupt the airflow signal to the ECU, and cause rough idle, hunting, high cold-start idle that fails to settle, and stumbling on light throttle application. The ECU stores learned idle positions that become invalid once the body is cleaned, requiring a throttle reset procedure.
Symptoms to notice
What to check
Ask the seller
26Throttle Body Carbon Fouling
Can't confirm for this car
CommonEngine $80–$300 to fix
Can't confirm for this car
Throttle body butterfly and bore accumulate carbon deposits from crankcase vapours causing rough idle and hesitation on deceleration.
Symptoms to notice
What to check
Ask the seller
Electrical
01Hybrid Inverter Coolant Pump Failure
Can't confirm for this car
OccasionalElectrical $900–$2,200 to fix
Can't confirm for this car
The 2ZR-FXE hybrid powertrain uses a dedicated electric water pump to cool the power control unit (inverter) and MG1/MG2 motor-generators. This pump is driven electronically and operates independently of the engine. On E210 hybrid Corolla models, the pump's internal brushless motor bearing and impeller have been reported to seize or fail silently, resulting in inverter overheating. Because the vehicle does not always display a prominent warning before shutdown, the failure can strand the driver with a loss of propulsion warning light and a forced system shutdown to protect the high-voltage electronics.
Symptoms to notice
What to check
Ask the seller
02Hybrid Transaxle MG2 Resolver Fault - Battery Warning
Can't confirm for this car
OccasionalElectrical $1,600–$6,500 to fix
Can't confirm for this car
The Motor Generator 2 resolver in the ZWE211/ZWE213 hybrid transaxle provides rotor angular position feedback to the hybrid control ECU for precise motor current commutation. Internal resolver winding degradation caused by thermal cycling, or harness chafing against the transaxle casing, causes the power electronics ECU to log resolver-related diagnostic trouble codes including P0A1C, P0A1D, and P3004. This triggers the master warning triangle, traction battery caution indicator, and in some cases the hybrid system unavailable message. The vehicle may enter a degraded driving mode with limited or no electric motor assist. In severe resolver failure the system defaults to engine-only propulsion with substantially reduced performance and fuel economy. Fault incidence increases with high cumulative mileage above 120,000 km.
Symptoms to notice
What to check
Ask the seller
03Hybrid High-Voltage Battery Cooling Fan Blockage
Can't confirm for this car
OccasionalElectrical $150–$4,500 to fix
Can't confirm for this car
The nickel-metal hydride or lithium-ion high-voltage traction battery in E210 hybrid Corolla models is cooled by a cabin-air intake fan mounted beneath the rear seat. This fan draws air through a duct from inside the passenger compartment, and the intake grille can accumulate lint, dust, and debris — particularly in vehicles with pet hair or heavy rear-seat use. A blocked or failing cooling fan causes the battery management system to derate output power and, in sustained operation, can accelerate cell degradation. Toyota requires the fan and intake duct to be inspected and cleaned at scheduled service intervals, but this step is frequently missed by non-franchise workshops.
Symptoms to notice
What to check
Ask the seller
04Electric Power Steering (EPS) Motor and Control Unit Failure
Can't confirm for this car
OccasionalElectrical $900–$2,800 to fix
Can't confirm for this car
The Runx/Allex uses a column-mounted electric power steering (EPS) system in place of a hydraulic rack. The EPS motor is mounted directly on the steering column and is controlled by an ECU that monitors torque sensor inputs to modulate assist. The column torque sensor, the brushed DC assist motor, and the EPS ECU are all age-sensitive components that degrade in NZ's humid conditions. Failure modes include partial assist loss producing abnormally heavy steering, intermittent assist that cuts in and out, and complete assist failure accompanied by an EPS warning lamp on the instrument cluster.
Symptoms to notice
What to check
Ask the seller
0512V Auxiliary Battery Drain Causes Ready Mode Lockout
Can't confirm for this car
CommonElectrical $180–$480 to fix
Can't confirm for this car
The Corolla Hybrid relies on a compact 12V auxiliary battery to initialise the hybrid management ECU, gateway module, and all accessory circuits before the system can achieve Ready mode. Unlike a conventional vehicle, the 12V battery is not charged by a belt-driven alternator but by a DC-DC converter drawing from the high-voltage traction pack only while the system is active. A persistent parasitic drain from the always-on gateway ECU, infotainment keep-alive circuits, and alarm system causes premature 12V battery capacity loss, typically within 3 to 4 years. A flat 12V battery prevents the push-button start from initialising the hybrid system, leaving the driver stranded despite a fully charged high-voltage traction battery. Many owners are unaware the vehicle even has a 12V battery, delaying diagnosis. Jump starting requires knowledge of the auxiliary battery access point, which is non-obvious on these models.
Symptoms to notice
What to check
Ask the seller
Body, brakes, suspension & interior
01Sill and Floor Pan Rust (Coastal / NZ Conditions)
Can't confirm for this car
CommonBody & Rust $800–$4,500 to fix
Can't confirm for this car
AE-series Corollas are prone to structural rust along the inner and outer sills and rear floor pan sections, particularly in NZ coastal areas and the Waikato/Northland regions where road salt and humidity accelerate corrosion. Inner sill rot can be hidden under carpets, seam sealer and factory undercoat, making visual inspection unreliable. Rust here is a WOF failure point and may require major panel fabrication to repair properly. Patch repairs that hide deeper rot are widespread on older examples.
Symptoms to notice
What to check
Ask the seller
02Front Lower Control Arm Ball Joint Wear
Can't confirm for this car
CommonSuspension $280–$750 to fix
Can't confirm for this car
The front lower control arm on ZZE122 and ZRE142 Corollas uses a press-fit or bolt-in ball joint that experiences accelerated wear when operated on unsealed roads or when protective dust boots split and allow contamination. Worn ball joints introduce vertical play in the suspension geometry, degrading steering precision and alignment stability. Ball joint failure is a critical safety defect — complete separation of the joint causes immediate loss of wheel control and vehicle collapse onto the road surface.
 Example of the part — not this vehicle
A separated lower ball joint: the control arm has dropped and the wheel has splayed out under the guard.
Symptoms to notice
What to check
Ask the seller
03Hydraulic Power Steering Rack Seal Leak
Can't confirm for this car
CommonSuspension $750–$1,900 to fix
Can't confirm for this car
ZE111 and ZE121 Corollas with hydraulic power steering (non-electric) use a rack-and-pinion unit with internal seals that prevent high-pressure fluid from bypassing the rack piston. These seals harden and crack with age, allowing power steering fluid to leak past the piston and internally within the rack, reducing assistance. External seal failure at the rack ends or pinion shaft produces visible fluid weeping onto the subframe and crossmember. The power steering pump can also be damaged when fluid level drops far enough to run the pump dry. Toyota hydraulic racks are typically replaced rather than resealed due to the cost of internal seal kits and the precision required.
Symptoms to notice
What to check
Ask the seller
04Rear Torsion Beam Suspension Bush Deterioration
Can't confirm for this car05Rear Trailing Arm Bush Collapse and Camber Drift
Can't confirm for this car
CommonSuspension $350–$750 to fix
Can't confirm for this car
The rear suspension on ZE111–ZE141 Corollas uses a torsion-beam axle with trailing arms located by large rubber bushes at the body mounting points. These bushes carry the full fore-aft and vertical load of the rear axle and are known to collapse or delaminate from 100,000 km onwards. When a bush collapses on one side the rear axle skews, inducing toe-out on the affected side, which causes rear-end instability and rapid tyre wear. The failure is asymmetric — one bush often deteriorates faster than the other, making handling effects unpredictable. Replacement requires a press and correct torque-to-dimension procedure.
Symptoms to notice
What to check
Ask the seller
06Front Lower Control Arm Bush Deterioration
Can't confirm for this car
Very commonSuspension $280–$650 to fix
Can't confirm for this car
The front lower control arm uses a large rear bush pressed into the arm to absorb fore-aft loads and a smaller ball-joint-side front bush for lateral control. The rear bush in particular is subject to significant rotational load and degrades within 80,000–120,000 km in New Zealand conditions. Deteriorated bushes allow the control arm to move in unintended directions under braking and cornering, causing characteristic clunking over speed bumps and poor straight-line tracking. The condition is compounded by rough roads and by owners who skip wheel alignments after bush wear begins.
Example of the part — not this vehicleA separated lower ball joint: the control arm has dropped and the wheel has splayed out under the guard.
Symptoms to notice
What to check
Ask the seller
07Rear Drum Adjuster Corrosion — Ineffective Handbrake
Can't confirm for this car08Brake Caliper Slide Pin Seizure Causing Uneven Pad Wear
Can't confirm for this car
Very commonBrakes $150–$450 to fix
Can't confirm for this car
The front (and occasionally rear) brake calipers on all Corolla generations use sliding pins to allow the caliper body to float and apply even pressure from both the piston and reaction sides of the rotor. The pins are steel running in an aluminium bracket and are sealed by rubber boots. In NZ conditions, boot cracking allows moisture and road salt ingress that corrodes the pin and bore, seizing the caliper in a partially applied position. This causes the inner pad to wear to metal while the outer pad retains full thickness, and produces a constant drag that overheats the rotor and caliper. The failure is detectable before it becomes critical if inspected at each tyre rotation.
Symptoms to notice
What to check
Ask the seller
09Rear Drum Brake Adjuster Seizure
Can't confirm for this car
Very commonBrakes $150–$450 to fix
Can't confirm for this car
The self-adjusting mechanism inside the rear drum brakes on AE-series Corollas seizes with age and corrosion, leaving the brake shoe clearance fixed as the drum and shoes wear. The result is progressively reduced rear brake effectiveness and uneven front-to-rear balance. In severe cases the adjuster star wheel corrodes solid and the parking brake cable also seizes. Very common on NZ cars exposed to coastal or wet conditions and vehicles with long service intervals.
Symptoms to notice
What to check
Ask the seller
10Electric Power Steering Rack Internal Rattle and Knock
Can't confirm for this car
CommonSuspension $180–$1,800 to fix
Can't confirm for this car
The ZRE142 Corolla's electric power steering (EPS) rack uses a recirculating ball-nut assembly assisted by an electric motor and reduction gear. The rack bush and yoke adjuster wear over time, allowing the rack to develop internal axial play that produces a knocking or rattling noise transmitted through the steering column and floor. In addition, the EPS motor's internal reduction gear can develop backlash, creating a steering wander complaint alongside the mechanical noise. Replacement of the yoke spring and adjuster can resolve early-stage rattle, but advanced wear requires rack replacement.
Symptoms to notice
What to check
Ask the seller
11Rear Disc Brake Pad Rapid Wear & Caliper Seizure
Can't confirm for this car
CommonBrakes $250–$950 to fix
Can't confirm for this car
ZRE172 Corollas fitted with rear disc brakes exhibit disproportionately rapid rear pad wear, compounded by rear caliper slide pin corrosion and seizure in NZ and AU environmental conditions. The factory brake bias and pad compound combination causes rear pads to wear faster than front pads in urban stop-start duty cycles, and seized slide pins cause uneven pad contact that accelerates wear on the inner pad face while the outer pad appears healthy. Vehicles used primarily in city driving or infrequently can exhaust rear pads as quickly as 30,000 to 40,000 km compared to the expected 60,000 km or more. Seized calipers also score rotor faces, escalating repair costs to include disc replacement. Coastal and high-rainfall environments throughout NZ and AU accelerate caliper slide pin corrosion significantly. The drum-in-disc handbrake mechanism is a secondary corrosion point.
Symptoms to notice
What to check
Ask the seller
12Front Strut Top Mount Bearing Wear and Clunking
Can't confirm for this car
Very commonSuspension $350–$900 to fix
Can't confirm for this car
The front MacPherson strut top mount assembly on NZE121 and ZZE123 models incorporates a thrust bearing that allows the strut to rotate when the steering is turned. This bearing is a dry-contact needle or ball race unit that has no regreasing provision and wears progressively with age and mileage. As the bearing degrades it develops flat spots and corrosion, producing a clunk or knock that is transmitted directly through the suspension turret into the cabin. At advanced wear stages the mount loses its ability to locate the spring correctly, causing variable steering returnability and unpredictable front-end feel.
Symptoms to notice
What to check
Ask the seller
13Rear Torsion Beam Bush Collapse
Can't confirm for this car
CommonSuspension $200–$550 to fix
Can't confirm for this car
Rear beam axle rubber bushes harden and collapse causing rear knocking and imprecision on urban-use Corolla examples.
Symptoms to notice
What to check
Ask the seller
Toyota Runx faults in detail
1NZ-FE Excessive Oil Consumption from Piston Ring Wear2ZR-FE GDI Intake Valve Carbon Deposit Fouling2ZZ-GE VVTL-i Valve Lifter Failure at High RPMK120 CVT Belt Shudder at Cruise SpeedsM20A-FKS Timing Chain Cold-Start RattleRear Drum Adjuster Corrosion — Ineffective HandbrakeRear Torsion Beam Suspension Bush Deterioration
What these repairs cost on other cars
Some of the Toyota Runx’s documented faults are repairs other models share. Each page lists the documented NZ cost for every model it affects.
Other Toyota models
Toyota Runx buyer questions
Is the Toyota Runx reliable?
Like any used car, it depends on the specific example and its service history. Across the 44 documented faults for the Toyota Runx, the recurring problem areas are engine, body & rust, and cooling. A Toyota Runx with a full service history and no signs of the issues listed on this page can be a sound buy but each one needs to be checked individually before you commit.
What are the most common problems with a used Toyota Runx?
We've catalogued 44 known faults for the Toyota Runx, covering engine, body & rust, and cooling. All 44 are written out in full on this page, with the symptoms to notice, what to inspect, and typical repair costs for each. Free to read, no account needed.
How much do repairs cost on a Toyota Runx?
Most single repairs on the Toyota Runx fall between $400–$1,800 at NZ independent-workshop rates. Some of the 44 documented faults cost less and a few cost considerably more, and no one car needs them all. Knowing which ones to look for before you view is what lets you negotiate the price down or walk away.
Should I get a pre-purchase inspection on a Toyota Runx?
Yes. A Toyota Runx inspection focused on its known weak points is the single best way to avoid an expensive mistake. KickTyres gives you a guided, model-specific inspection plus a market valuation and negotiation figure for $24.90 far less than the cost of missing one of the faults on this page.