Skip to content
Kia2005–2023 Critical issues documented

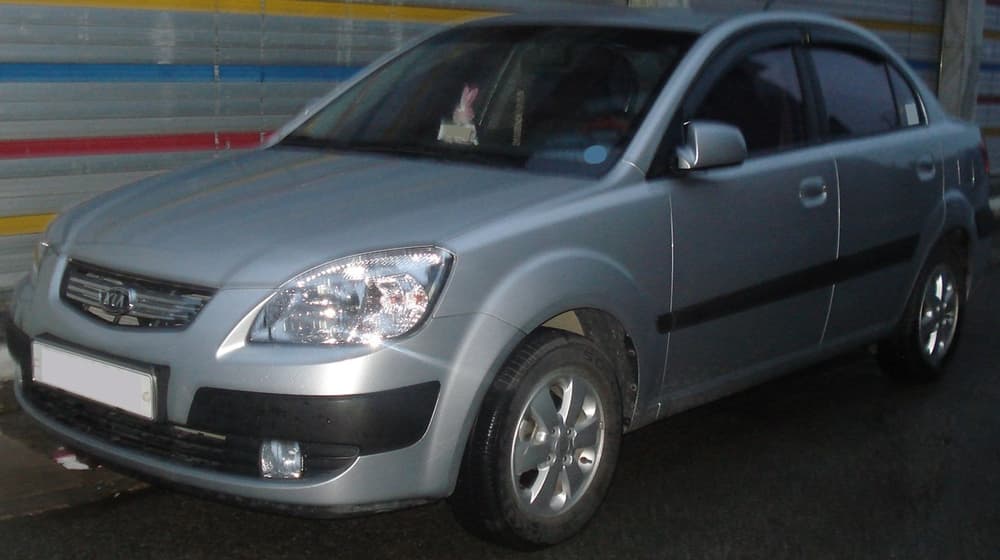
Kia Pride JB: common faults & what to check

The JB is the Kia Pride built 2005–2012. Of the 14 faults documented for the Pride, 3 apply to this generation, each with its symptoms, what to inspect and a typical repair cost. Free, no account needed.

Check this exact Kia Pride

  • Odometer history
  • Money owing
  • Reported stolen
  • Ownership history
  • Official NZ vehicle register data
  • NZ owned and operated

Type the plate for the free basics. The full record is a paid check from $13.49, one car at a time, no subscription.

No NZ plate yet, or buying in Australia? Pick the generation and engine and start a free check below. New to KickTyres? How the check works →

14

Documented faults

Critical

Most serious

$450–$1,400

Typical repair

5

Systems covered

You're looking at the JB

Everything below is narrowed to this variant. Pick a different one to change it.

Choose a different generation

Now narrow it to the engine

A 1.8 and a 2.4 of the same car do not fail the same way, so the faults below narrow to the engine as well as the year. Free, no account needed.

A 2005 Kia Pride is the JB generation (2005 to 2012).

Start your free check on this Kia Pride

No plate needed. You get the risk score, the buyer's checklist and the guided inspection for the exact car you picked above — not the whole nameplate.

Kia Pride JB

Free. The paid plate check is separate, and stays optional.

Can't confirm for this car

Kia Pride · 2005

Narrowed to the year. No engine is recorded for this vehicle. Pick an engine to see which faults apply.

Tell us the engine, or check the engine code on the car, before relying on this.

  • No engine is recorded for this vehicle.

matched on year only

What to look out for

The checks worth doing on a Kia Pride before you hand over any money. Every documented fault is listed below, each with its own page.

  • Costly issue

    Attempt manual rotation of adjuster — it must turn smoothly throughout full range.

    See why

    Rear drum brake adjuster corrosion and seizure

    The rear drum brake self-adjusters on the Rio JB are constructed from dissimilar metals—a steel adjuster screw thread inside a pot-metal or aluminium nut—that form a galvanic corrosion cell in wet climates. Once corrosion prevents the adjuster from rotating, the brake shoes cannot self-compensate for lining wear. The drum-to-shoe clearance grows progressively until the brake pedal must travel significantly further before rear brakes engage, increasing stopping distances. In extreme cases the adjuster seizes in an over-expanded position, making drum removal impossible without destructive intervention to the adjuster or wheel cylinder. New Zealand's winter moisture and road contamination significantly accelerate this failure compared to drier climates.

    What you would notice

    • Long or soft brake pedal that marginally improves after reversing and applying brakes
    • Vehicle pulling to one side under moderate braking
    • Rear brakes requiring manual adjustment to pass WOF repeatedly
    • Drum impossible to remove without cutting or destroying adjuster assembly

    Typically $150–$450 to put right.

See all 3 issues for this oneDocumented for the exact year and engine you picked, including 1 rated critical.
Body, brakes, suspension & interior1

01Rear drum brake adjuster corrosion and seizure

Attempt manual rotation of adjuster — it must turn smoothly throughout full range.petrol2005–2011Brakes
CommonBrakes $150–$450 to fix

The rear drum brake self-adjusters on the Rio JB are constructed from dissimilar metals—a steel adjuster screw thread inside a pot-metal or aluminium nut—that form a galvanic corrosion cell in wet climates. Once corrosion prevents the adjuster from rotating, the brake shoes cannot self-compensate for lining wear. The drum-to-shoe clearance grows progressively until the brake pedal must travel significantly further before rear brakes engage, increasing stopping distances. In extreme cases the adjuster seizes in an over-expanded position, making drum removal impossible without destructive intervention to the adjuster or wheel cylinder. New Zealand's winter moisture and road contamination significantly accelerate this failure compared to drier climates.

Symptoms to notice

  • Long or soft brake pedal that marginally improves after reversing and applying brakes
  • Vehicle pulling to one side under moderate braking
  • Rear brakes requiring manual adjustment to pass WOF repeatedly
  • Drum impossible to remove without cutting or destroying adjuster assembly

What to check

Attempt manual rotation of adjuster — it must turn smoothly throughout full range. Check drum inner diameter for scoring from shoe-metal contact if adjuster seized in expanded position. Inspect wheel cylinder boots for weeping brake fluid. If a workshop inspection is possible: Remove both rear drums and inspect adjuster star wheels for surface corrosion and seized threads.

Where to look: Both rear wheels, inside drum brake assembly on backing plate between wheel cylinder and shoe anchor

Parts involved: Body corrosion.

Ask the seller

  • “When were the rear brakes last fully serviced including adjuster lubrication?”
  • “Has the handbrake required adjustment more than once in the past two years?”
  • “Does the car pull to one side under braking, or does the pedal feel longer than normal?”
Depends on the exact engine — 2 moreDocumented for a specific engine we could not confirm from what you picked. Check the engine code on the car.
Engine, transmission & cooling2

01Gamma G4EE/G4ED timing belt tensioner spring fatigue

Remove timing cover and check belt deflection against Kia specification (typically 6-9 mm).petrol2005–2011Engine
CommonEngine $380–$780 to fix

Can't confirm for this car

The G4EE 1.4L and G4ED 1.6L Gamma engines use a spring-loaded timing belt tensioner whose coil spring progressively loses preload from repeated thermal cycling and age. Once spring force drops below specification, belt tension becomes insufficient under high rpm or cold-start conditions, allowing the belt to skip one or more teeth on the camshaft sprocket. Because the Gamma is an interference engine, skipping even one tooth causes piston-to-valve contact, bending inlet and exhaust valves and typically destroying the cylinder head. Failure is sudden and gives no audible warning because the belt itself remains intact—only the spring tension is lost. Owners who replaced only the belt without the tensioner spring are at elevated risk.

Symptoms to notice

  • Sudden complete loss of power at highway speed
  • Engine cranks but will not start after belt skip event
  • Metallic impact sound from engine at moment of failure
  • No warning lights prior to catastrophic valve contact

What to check

  1. Remove timing cover and check belt deflection against Kia specification (typically 6-9 mm).
  2. Inspect tensioner spring for corrosion, fatigue, or collapse.
  3. Confirm any prior timing service included the tensioner spring, not only the belt and idler pulley.

Where to look: Front of engine block, behind plastic timing cover on driver-side

Parts involved: Timing belt.

Ask the seller

  • “Has the timing belt AND tensioner spring been replaced, and can you show a receipt?”
  • “At what mileage was the last timing belt service completed?”
  • “Was the water pump replaced at the same time as the belt?”

02Gamma 1.4/1.6 oil consumption from PCV valve failure

Pull the PCV valve out of the cam cover bung and shake it — a serviceable valve rattles freely; a stuck valve is silent.petrol2005–2011Engine
CommonEngine $90–$280 to fix

Can't confirm for this car

The Gamma G4EE 1.4L and G4ED 1.6L engines fitted to the Rio JB use a PCV valve integrated into the camshaft cover. The valve contains a spring-loaded diaphragm that regulates crankcase pressure by metering blow-by gases back into the intake. The diaphragm degrades from heat cycling, oil vapour contamination, and age, either sticking open or rupturing. When the valve fails open or the diaphragm tears, crankcase pressure rises above design specification and forces oil vapour through the valve stem seals and past the piston ring pack into the combustion chambers, where it burns. Oil consumption of 500-1,500 mL per 5,000 km results. The intake manifold and throttle body accumulate oil deposits progressively. A blocked PCV has the opposite effect: excessive crankcase vacuum collapses intake hoses and causes oil to be ingested in larger volumes.

Symptoms to notice

  • Oil level dropping 500-1,500 mL between 5,000 km services without visible external leak
  • Blue-grey smoke from exhaust on overrun or engine braking
  • Oil film or wet residue inside air intake duct at throttle body connection
  • Faint oil smell from engine bay at operating temperature without puddles under the car

What to check

  1. Pull the PCV valve out of the cam cover bung and shake it — a serviceable valve rattles freely; a stuck valve is silent.
  2. Inspect the cam cover breather port passage for varnish deposit blockage.
  3. If a workshop inspection is possible: Remove the intake hose between the airbox and throttle body and inspect inner walls for an oil film coating.

Where to look: Top of engine integrated into the rear of the camshaft cover breather port

Parts involved: PCV / oil separator.

Ask the seller

  • “How often do you need to top up the engine oil between scheduled services?”
  • “Has the car ever produced blue or grey smoke from the exhaust, particularly when lifting off the accelerator?”
  • “Has the PCV valve ever been inspected or replaced?”
Other Kia Pride engines and years11 documented issues that do not apply to the one you picked.
Engine, transmission & cooling9

01G4LA 1.2 Timing Chain Plastic Guide Rail Failure

Start cold and listen for a metallic rattle from the front of the engine in the first 5-10 seconds.petrol2011–2017Engine
Read the full fault: symptoms, where to look, what to ask the seller

02Gamma G4FA/G4FG Timing Chain Stretch

Connect an OBD2 scanner for camshaft/crankshaft correlation codes.petrol2011–2017Engine
CommonEngine $900–$2,400 to fix

Does not apply

The 1.4L G4FA and 1.6L G4FG Gamma engines in the UB-generation Rio are prone to timing chain elongation before 100,000 km. Kia acknowledged the fault through an extended warranty programme in South Korea covering Gamma-engined vehicles. A stretched chain causes incorrect valve timing, rough running, and can jump a tooth leading to catastrophic engine damage. Oil change discipline is critical; extended intervals accelerate chain and guide wear significantly.

The front of a dual overhead camshaft engine with the timing cover removed, exposing the timing chain and sprockets.Example of the part — not this vehicle

The front of a twin-cam engine with the timing cover off — chain, sprockets and guides.

Logansenf · CC BY-SA 4.0 · Wikimedia Commons

Symptoms to notice

  • Rattling or slapping noise on cold start from front of engine
  • Check engine light with timing-related fault codes (P0016 or P0017)
  • Rough idle that may clear once warm
  • Reduced power or hesitation on acceleration in advanced cases

What to check

Connect an OBD2 scanner for camshaft/crankshaft correlation codes. Cold-start the engine and listen for chain rattle from the front cover before oil pressure builds. Check the oil filler cap interior for sludge. Review service history for oil change intervals — intervals above 10,000 km or use of incorrect oil viscosity accelerate wear.

Where to look: Timing chain inside front of engine block, behind the front timing cover

Parts involved: Timing chain.

Ask the seller

  • “Can you show full service history including oil change dates and intervals?”
  • “Has the timing chain or tensioner ever been replaced?”
  • “Has a workshop inspected the timing chain condition?”

03YB 7-Speed DCT Clutch Pack Judder and Shudder

During a test drive, pull away slowly from rest multiple times, including on a slight hill.petrol2017–2023Transmission
CommonTransmission $1,500–$3,800 to fix

Does not apply

The YB-generation Rio paired with Hyundai-Kia's 7-speed dual-clutch transmission (D-DCT, code 7DCT300) exhibits clutch judder and shudder during low-speed engagement below approximately 30 km/h, particularly when pulling away from rest on inclines or in traffic. The wet clutch packs develop chatter due to a combination of clutch pack material wear and software calibration. Kia released multiple TSBs and software updates, but hardware replacement of the clutch pack is often the definitive fix. This mirrors the wider Hyundai-Kia DCT complaint wave that triggered investigations in South Korea and the US.

Symptoms to notice

  • Vibration or shudder felt through the seat and floor during low-speed pull-away
  • Jerking or hunting when creeping in stop-start traffic
  • Clunk or hesitation when transitioning from drive to reverse at low speed
  • Transmission warning light in severe cases with fault code P0726 or related clutch slip codes

What to check

During a test drive, pull away slowly from rest multiple times, including on a slight hill. Note any vibration, shudder, or jerking through the drivetrain at low speed. Engage and disengage the accelerator gently in slow-moving traffic and check for lurching. Ask for any TCU software update history from Kia.

Where to look: Transmission tunnel, dual-clutch gearbox unit mounted to front of engine

Parts involved: Clutch.

Ask the seller

  • “Has the transmission ever shuddered or juddered when pulling away, and has Kia looked at it?”
  • “Has the TCU software been updated at a Kia dealer — is there a record of that?”
  • “Has the dual-clutch pack ever been replaced under warranty or out of pocket?”

041.0 T-GDi G3LC timing chain tensioner cold-start rattle

Start engine cold after overnight soak and listen for rattle from timing cover at front of engine.petrol2017 onwardEngine
CommonEngine $700–$1,800 to fix

Does not apply

The hydraulic timing chain tensioner on the G3LC 1.0 T-GDi loses oil pressure after the engine sits for several hours. On cold start this causes a brief metallic rattling from the front of the engine lasting 1-3 seconds while oil pressure rebuilds. Repeated episodes accelerate chain and tensioner wear. Kia issued a revised tensioner part and mandated 0W-20 full-synthetic oil specification through service campaigns in affected markets. Prolonged neglect can result in chain stretch and cam timing codes.

The front of a dual overhead camshaft engine with the timing cover removed, exposing the timing chain and sprockets.Example of the part — not this vehicle

The front of a twin-cam engine with the timing cover off — chain, sprockets and guides.

Logansenf · CC BY-SA 4.0 · Wikimedia Commons

Symptoms to notice

  • Metallic rattling from engine front on cold start lasting 1-3 seconds
  • Rattle disappears once oil pressure builds at idle
  • Check engine light with cam timing codes if chain has stretched
  • Rattle worsens in cold weather conditions

What to check

  1. Start engine cold after overnight soak and listen for rattle from timing cover at front of engine.
  2. Check oil level and condition.
  3. Verify service history uses 0W-20 full-synthetic oil at correct intervals.
  4. If a workshop inspection is possible: Scan for cam timing fault codes with OBD reader.

Where to look: Front of engine, timing chain cover area

Parts involved: Timing chain.

Ask the seller

  • “Has the timing chain tensioner been inspected or replaced under any Kia service campaign?”
  • “What oil specification has been used - is it 0W-20 full synthetic at every service?”
  • “Has the engine ever shown a check engine light related to cam timing?”

05G3LC 1.0 Turbo Electronic Wastegate Actuator Failure

Scan for live boost pressure data and compare to specification under load (approximately 1.0–1.2 bar).petrol2017–2023Engine
OccasionalEngine $650–$1,600 to fix

Does not apply

The G3LC 1.0-litre turbocharged three-cylinder engine uses an electronic (motorised) turbocharger wastegate actuator rather than a traditional pneumatic unit. The actuator motor and position sensor are prone to failure, causing the wastegate to stick open or closed. A stuck-open wastegate produces underboost and severe power loss; a stuck-closed wastegate risks overboost. The ECU typically detects the fault and forces the engine into limp mode, limiting boost to protect hardware. Replacement requires removing the turbocharger assembly.

Symptoms to notice

  • Sudden loss of power with engine entering limp mode, often above 3,000 rpm
  • Check engine light with P0299 underboost or P0234 overboost codes
  • Inconsistent acceleration — full power on some pulls but not others
  • Audible boost leak hiss or no turbo spool sound under hard acceleration

What to check

  1. Scan for live boost pressure data and compare to specification under load (approximately 1.0–1.2 bar).
  2. Check for fault codes P0234 (overboost), P0299 (underboost), or P0045/P0046 (turbo wastegate control).
  3. Inspect the actuator wiring harness on the turbocharger for heat damage or chafing.
  4. On the road test, confirm full-throttle acceleration feels consistent from 2,000–4,500 rpm with no sudden power drop.

Where to look: Turbocharger assembly on the rear of the engine block, actuator mounted on the turbine housing

Parts involved: Turbocharger.

Ask the seller

  • “Has the turbocharger or wastegate actuator ever been replaced or flagged by a dealer diagnostic scan?”
  • “Has the car ever entered limp mode or shown a power loss fault code?”
  • “Is the car still under Kia's 5-year warranty, and has the turbo system been checked recently?”

06G4LC VVT oil control valve sticking causing P0011

Check engine oil condition - sludgy or dark oil is a direct risk factor for OCV sticking.petrol2017 onwardEngine
OccasionalEngine $250–$1,500 to fix

Does not apply

The G4LC 1.4-litre engine uses a variable valve timing system controlled by an oil control valve on the intake camshaft. The OCV is susceptible to sticking in a partially open or closed position due to oil sludge from infrequent service intervals or internal valve wear. A sticking OCV causes the intake camshaft phaser to hold in an over-advanced position, triggering fault code P0011 (Intake Camshaft Position Timing Over-Advanced Bank 1). Symptoms include rough idle, reduced power, and check engine light. Replacing the OCV with a genuine Kia part resolves most cases; advanced cases with a failed phaser require camshaft phaser replacement at significantly higher cost.

Symptoms to notice

  • Check engine light with P0011 fault code stored
  • Rough or lumpy idle especially after reaching operating temperature
  • Reduced throttle response and power output
  • Increased fuel consumption
  • Engine hesitation that appears or worsens after warm-up

What to check

Check engine oil condition - sludgy or dark oil is a direct risk factor for OCV sticking. Verify oil change service history and confirm correct oil grade was used. On vehicles with irregular service records, budget for OCV replacement as part of purchase price negotiation. If a workshop inspection is possible: Scan for fault codes with an OBD reader, specifically P0011, P0014, and any related cam position or VVT system codes.

Where to look: Intake camshaft oil control valve mounted in cylinder head, accessible from top of engine near cam cover

Ask the seller

  • “Has a check engine light ever appeared with a P0011 cam timing fault code?”
  • “How frequently has the engine oil been changed and what grade was used?”
  • “Has the VVT oil control valve been replaced or cleaned by a workshop?”

071.4 G4LC direct injection intake valve carbon buildup

The G4LC 1.4-litre direct-injection engine injects fuel directly into the combustion chamber, bypassing the intake valves entirely.petrol2017 onwardEngine
CommonEngine $600–$1,400 to fix

Does not apply

The G4LC 1.4-litre direct-injection engine injects fuel directly into the combustion chamber, bypassing the intake valves entirely. Without fuel washing the valve stems and heads, combustion blow-by gases deposit oily carbon on the back face of the intake valves over time. Buildup becomes significant after 80,000-120,000 km and causes rough idle, hesitation on acceleration, misfires under load, and reduced volumetric efficiency. Walnut-blast media cleaning or manual mechanical scraping is required; standard fuel additives are ineffective as they never contact the valve faces during normal operation.

Symptoms to notice

  • Rough or lumpy idle particularly when cold
  • Hesitation or stumble under light throttle acceleration
  • Misfires under load with P030x codes
  • Reduced fuel economy at higher mileage
  • Occasional difficulty starting from cold

What to check

Request bore-scope inspection of intake valve heads and stems through intake ports with manifold removed, or through spark plug apertures where geometry allows. On vehicles above 80,000 km assume some degree of carbon buildup. Verify service history includes any preventive intake cleaning record. If a workshop inspection is possible: Check for misfire codes with OBD scanner.

Where to look: Intake valves and valve stems, accessible via intake manifold runner ports

Ask the seller

  • “Has intake valve carbon deposit cleaning ever been performed and at what mileage?”
  • “Has a bore-scope inspection been done on the intake valves?”
  • “Has any misfire code or rough idle been reported to a workshop?”

08Coolant Thermostat Failure Causing Overheating or Under-Temperature Running

On a cold start, watch the temperature gauge — it should reach the normal mid-range mark within 5–8 minutes of driving.petrol2011–2023Cooling
OccasionalCooling $220–$580 to fix

Does not apply

The Rio across UB and YB generations uses a wax-element thermostat that is known to fail in both the stuck-open and stuck-closed positions. A thermostat stuck open causes the engine to run below operating temperature (fan heater blows cold, fuel economy worsens, emissions increase). A thermostat stuck closed is the more dangerous failure mode — coolant cannot circulate to the radiator, leading to rapid overheating. Given the small cooling system volume in these 1.0–1.6 litre engines, overheating can cause head gasket damage within minutes. Kia dealer technicians commonly encounter this at 80,000–130,000 km.

An annotated photograph of an automotive engine thermostat identifying the wax capsule and both disc valves.Example of the part — not this vehicle

A double-valve engine thermostat, labelled: the wax capsule is what sticks.

Dougsim · CC BY-SA 3.0 · Wikimedia Commons

Symptoms to notice

  • Temperature gauge sitting below normal range even after 10+ minutes of driving
  • Heater producing only lukewarm air in cold weather
  • Temperature gauge climbing rapidly into the red with steam from the bonnet in stuck-closed failure
  • P0128 coolant temperature below thermostat regulating temperature fault code

What to check

  1. On a cold start, watch the temperature gauge — it should reach the normal mid-range mark within 5–8 minutes of driving.
  2. A gauge that stays low at highway speeds indicates a stuck-open thermostat.
  3. Check the coolant reservoir level and condition (should be clear or light green/pink, not rusty or oily).
  4. Feel both radiator hoses when warm — if the lower hose stays cold while the upper is hot, coolant is not circulating.
  5. Scan for coolant temperature codes P0128.

Where to look: Thermostat housing on the engine block, typically on the lower coolant hose side

Parts involved: Thermostat.

Ask the seller

  • “Has the thermostat or any cooling system component been replaced, and is there an invoice?”
  • “Has the car ever overheated or shown a high temperature warning light?”
  • “When was the coolant last flushed and replaced with fresh coolant?”

09G3LC 1.0T Intercooler Boost Pipe Separation Under Load

petrol2017–2023Engine
OccasionalEngine $120–$450 to fix

Does not apply

The 1.0T G3LC engine routes compressed air from the turbocharger through a front-mounted intercooler via rubber boost hoses with push-fit or clamp connections. These hoses are routed close to heat sources and are subject to constant pressure cycling. Over time the rubber hardens and cracks, or the hose clamps loosen, particularly at the intercooler outlet-to-throttle body connection. When a hose separates under boost, the engine loses all turbo pressure, enters limp mode, and emits a loud hiss. The failure is typically repeatable under hard acceleration.

Symptoms to notice

  • Loud hissing or whooshing noise under hard acceleration, especially above 3,000 rpm
  • Sudden power loss followed by limp mode with P0299 underboost code
  • Engine recovers power after backing off and restarting in some cases
  • Visible oil mist or residue around hose clamp connections on the intercooler

What to check

Inspect all boost hose connections by hand — squeeze each rubber hose and check for cracking, brittleness, or oil residue at the joins (oil mist indicates blow-by at a loose connection). With the engine running at idle, listen for any hissing from the engine bay. On a hard-acceleration road test at 3,000–4,500 rpm, confirm boost delivery feels consistent. Scan for P0299 underboost or P2263 turbo performance codes.

Where to look: Boost pipe routing from turbocharger to front-mounted intercooler, and intercooler outlet hose to throttle body

Parts involved: Turbocharger.

Ask the seller

  • “Has the car ever lost power suddenly under hard acceleration or shown an underboost warning?”
  • “Have any intercooler pipes or boost hoses been replaced or reseated by a mechanic?”
  • “Has a dealer or workshop inspected the turbo boost plumbing for leaks?”
Body, brakes, suspension & interior2

01UB/YB ABS and ESC Control Module Corrosion Failure

Check the dashboard for any illuminated ABS, ESC, or brake warning lights.petrol2011–2020Brakes
OccasionalBrakes $600–$1,700 to fix

Does not apply

The Rio's ABS/ESC hydraulic control unit and module are mounted low in the engine bay, exposing them to road water, salt spray, and mud splash. Internal circuit board corrosion causes the ABS and ESC systems to fail, illuminating both warning lights and disabling stability control. In some cases the ABS pump activates unpredictably at low speeds on dry roads, creating a distressing pedal pulse. This failure is more prevalent in vehicles used in coastal or high-salinity areas, common in New Zealand and coastal Australia. Replacement requires a new ABS modulator/ECU assembly.

Symptoms to notice

  • ABS and ESC warning lights illuminated simultaneously with no recent hard braking event
  • ABS activating and pulsing the brake pedal at low speed on dry roads unpredictably
  • Longer stopping distances due to ABS system disabling itself
  • C1200 or related ABS internal circuit fault codes on scan tool

What to check

  1. Check the dashboard for any illuminated ABS, ESC, or brake warning lights.
  2. Inspect the ABS modulator unit in the engine bay for white corrosion deposits or moisture ingress on the wiring connector.
  3. Test ABS operation at low speed in a safe area by applying firm brake pressure.
  4. Vehicles registered near coastlines should be treated as higher risk.
  5. If a workshop inspection is possible: With a scan tool, pull ABS module fault codes — C1200 series codes indicate internal module failure.

Where to look: ABS hydraulic modulator and control unit in the engine bay, typically mounted on the firewall or inner guard near the brake master cylinder

Parts involved: Body corrosion.

Ask the seller

  • “Have the ABS or ESC warning lights ever come on, and if so what was the diagnosis?”
  • “Has the car been used or registered near the coast or in areas with road salt?”
  • “Has the ABS modulator or any brake electronics ever been replaced?”

02Front lower control arm ball joint wear

petrol2017 onwardSuspension
CommonSuspension $450–$1,000 to fix

Does not apply

The front lower control arm ball joints on the Rio YB wear prematurely, particularly on vehicles used in urban environments with rough surfaces, or with mileage above 60,000 km. The ball joint is not separately serviceable on the OEM lower arm assembly; the entire lower control arm must be replaced once measurable play or wear is detected. Worn ball joints introduce vagueness into steering and produce clunking noises over road imperfections. In advanced stages, ball joint failure is a safety risk as separation causes sudden loss of front wheel positional control affecting steering and braking.

The front wheel of a car splayed outward with the lower control arm hanging down after a ball joint separation.Example of the part — not this vehicle

A separated lower ball joint: the control arm has dropped and the wheel has splayed out under the guard.

Elfix · CC0 · Wikimedia Commons

Symptoms to notice

  • Clunking or knocking from front suspension over bumps and dips
  • Clunk when turning steering wheel at low speed
  • Vague or imprecise steering feedback
  • Uneven or accelerated front tyre wear pattern
  • Vehicle pulling to one side during braking

What to check

  1. Lift front of vehicle safely and check each lower control arm ball joint for play by gripping the tyre at 6 and 12 o'clock and attempting to rock it while an assistant observes the joint.
  2. Listen for any clunks.
  3. Check the rubber ball joint boot for cracks or grease ejection.
  4. Inspect the lower arm front and rear bushings simultaneously as these also wear.
  5. A WOF check history showing ball joint advisory is significant.

Where to look: Front lower control arm, ball joint at wheel carrier junction, both left and right sides

Parts involved: Ball joint.

Ask the seller

  • “Have the front lower control arms or ball joints been replaced?”
  • “Is there any clunking from the front suspension over rough roads or speed humps?”
  • “Has any WOF inspection noted a front suspension advisory or failure?”

What these repairs cost on other cars

Some of the Kia Pride’s documented faults are repairs other models share. Each page lists the documented NZ cost for every model it affects.

Other Kia models

Kia Pride buyer questions

Is the Kia Pride reliable?

Like any used car, it depends on the specific example and its service history. Across the 14 documented faults for the Kia Pride, the recurring problem areas are engine, brakes, and transmission. A Kia Pride with a full service history and no signs of the issues listed on this page can be a sound buy but each one needs to be checked individually before you commit.

What are the most common problems with a used Kia Pride?

We've catalogued 14 known faults for the Kia Pride, covering engine, brakes, and transmission. All 14 are written out in full on this page, with the symptoms to notice, what to inspect, and typical repair costs for each. Free to read, no account needed.

How much do repairs cost on a Kia Pride?

Most single repairs on the Kia Pride fall between $450–$1,400 at NZ independent-workshop rates. Some of the 14 documented faults cost less and a few cost considerably more, and no one car needs them all. Knowing which ones to look for before you view is what lets you negotiate the price down or walk away.

Should I get a pre-purchase inspection on a Kia Pride?

Yes. A Kia Pride inspection focused on its known weak points is the single best way to avoid an expensive mistake. KickTyres gives you a guided, model-specific inspection plus a market valuation and negotiation figure for $24.90 far less than the cost of missing one of the faults on this page.