Skip to content
Mazda1999–2018 Critical issues documented

Mazda Mazda5 CR: common faults & what to check

The CR is the Mazda Mazda5 built 2005–2010. Of the 12 faults documented for the Mazda5, 11 apply to this generation, each with its symptoms, what to inspect and a typical repair cost. Free, no account needed.

Check this exact Mazda Mazda5

  • Odometer history
  • Money owing
  • Reported stolen
  • Ownership history
  • Official NZ vehicle register data
  • NZ owned and operated

Type the plate for the free basics. The full record is a paid check from $13.49, one car at a time, no subscription.

No NZ plate yet, or buying in Australia? Pick the generation and engine and start a free check below. New to KickTyres? How the check works →

12

Documented faults

Critical

Most serious

$400–$900

Typical repair

7

Systems covered

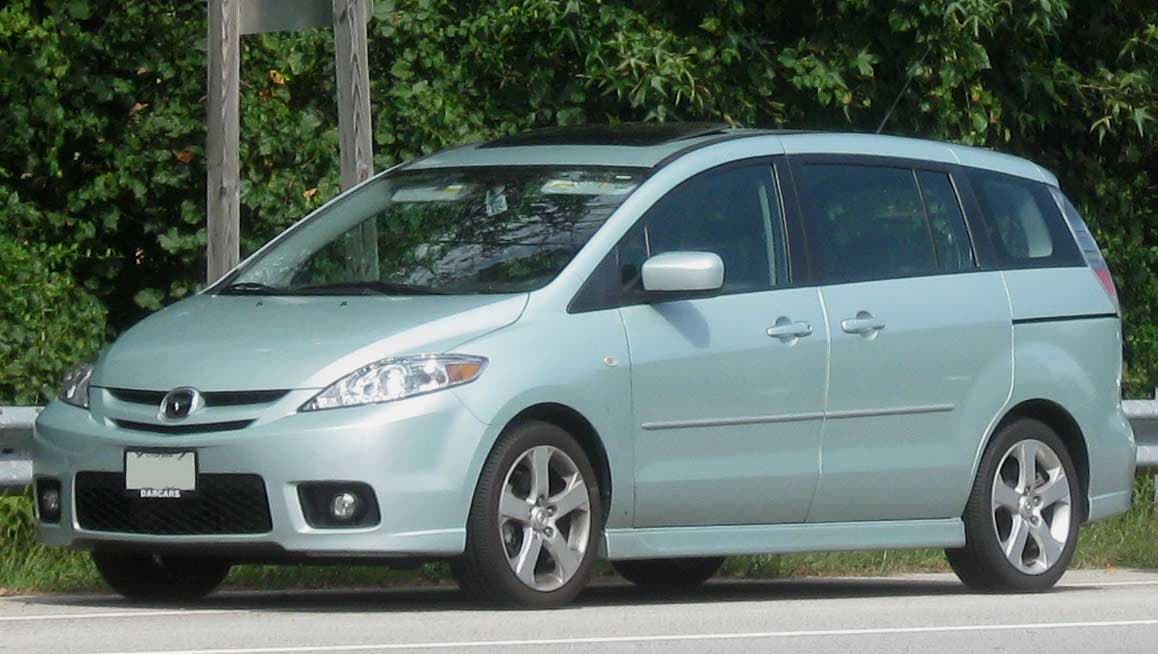
You're looking at the CR

Everything below is narrowed to this variant. Pick a different one to change it.

Choose a different generation

Now narrow it to the engine

A 1.8 and a 2.4 of the same car do not fail the same way, so the faults below narrow to the engine as well as the year. Free, no account needed.

Which engine is in it? These cover every year of this model.

A 2006 Mazda Mazda5 is the CR generation (2005 to 2010).

We cannot narrow the engine list to this year, so every engine this model was sold with is offered.

Start your free check on this Mazda Mazda5

No plate needed. You get the risk score, the buyer's checklist and the guided inspection for the exact car you picked above — not the whole nameplate.

Mazda Mazda5 CREngine not picked yet

Pick the engine above first: the Mazda5 came with 2, and without it the report has to show all of their faults. Pick the engine

Free. The paid plate check is separate, and stays optional.

Can't confirm for this car

Mazda Mazda5 · 2006

Narrowed to the year. No engine is recorded for this vehicle. Pick an engine to see which faults apply.

Tell us the engine, or check the engine code on the car, before relying on this.

  • No engine is recorded for this vehicle.

matched on year only

What to look out for

The checks worth doing on a Mazda Mazda5 before you hand over any money. Every documented fault is listed below, each with its own page.

  • Costly issue

    For hydraulic systems: inspect the steering rack boots for power steering fluid contamination and the reservoir for low fluid level.

    See why

    Electric Power Steering Rack Seal and Fluid Leak

    Premacy CR models fitted with hydraulic-assist power steering develop weeping and then active leaks at the inner rack seals and the high-pressure hose banjo fittings. The rack pinion seal fails due to age hardening of the rubber compounds, and the power steering fluid contaminates the subframe and surrounding chassis. CW models with electric power steering (EPS) develop a different failure: the motor control unit overheats or develops solder joint failures, triggering a loss-of-assist condition. Both variants generate a dashboard EPS or PS warning lamp.

    What you would notice

    • Power steering fluid seeping from the steering rack area, leaving oily residue on the subframe and inner guards
    • EPS or PS warning light illuminating on the instrument cluster, accompanied by heavy or intermittently absent steering assist

    Typically $800–$2,800 to put right.

  • Costly issue

    Cycle the sliding door three to four times using the power button and manually.

    See why

    Power sliding door cable fraying and roller failure

    The CP and CW Premacy sliding door operates via a cable-and-roller mechanism that stretches, frays and derails with age and use. The door may hesitate, reverse before latching, slam shut on a slope or trigger a continuous power-door warning light. Upper and lower track rollers corrode on older NZ examples, binding the door and accelerating cable wear. The failure mode ranges from inconvenient to a safety hazard if the door cannot be secured.

    What you would notice

    • Sliding door hesitates, reverses mid-travel or fails to latch
    • Power door warning lamp illuminated on instrument cluster
    • Door travel is jerky or makes grinding noise in track
    • Door rolls shut under gravity on a slope

    Typically $400–$900 to put right.

  • Costly issue

    With the front wheels off the ground, grasp the tyre at 6 and 12 o'clock and attempt to rock it; vertical play indicates ball joint wear.

    See why

    Front Lower Control Arm Ball Joint Wear

    The front lower control arms on the Premacy CR and CW use pressed-in ball joints that wear in the socket and boot. The rubber boot splits — accelerated by NZ road grit — allowing water and debris ingress that corrodes the ball stud. Advanced wear produces handling vagueness and a clunking noise over bumps. Worn ball joints are a direct WOF failure item. Replacement requires either pressing in a new ball joint or replacing the entire lower arm assembly; New Zealand parts supply favours arm assembly replacement.

    What you would notice

    • Clunking or knocking noise from the front suspension corners when traversing speed bumps, pot holes, or sharp directional changes
    • Vague or wandering steering feel with the vehicle tracking poorly in a straight line

    Typically $350–$750 to put right.

  • Costly issue

    Check for pulling under braking.

    See why

    Brake Caliper Guide Pin Seizure

    Front brake caliper guide pins seize from corrosion causing uneven pad wear.

    What you would notice

    • Vehicle pulling to one side under braking
    • One front disc hotter than the other after moderate use

    Typically $150–$500 to put right.

  • Costly issue

    Rear caliper guide pins seize causing uneven brake wear and drag on one side.

    See why

    Rear Brake Caliper Guide Pin Seizure

    Rear caliper guide pins seize causing uneven brake wear and drag on one side.

    What you would notice

    • Rear caliper guide pins seize causing uneven brake wear and drag on one side.
    • Confirm with pre-purchase inspection by a qualified mechanic
  • Costly issue

    Scan for EPS fault codes.

    See why

    Electric Power Steering Column Motor Failure

    EPS column motor fails causing sudden or gradual loss of power assistance.

    What you would notice

    • Sudden loss of power steering with EPS warning light
    • Heavy steering requiring effort especially at low speeds

    Typically $500–$1,800 to put right.

See all 11 issues for this oneDocumented for the exact year and engine you picked, including 1 rated critical.
Electrical1

01Electric Power Steering Column Motor Failure

Scan for EPS fault codes.1999–2018Electrical
OccasionalElectrical $500–$1,800 to fix

EPS column motor fails causing sudden or gradual loss of power assistance.

Symptoms to notice

  • Sudden loss of power steering with EPS warning light
  • Heavy steering requiring effort especially at low speeds

What to check

  1. Scan for EPS fault codes.
  2. Test steering — heavy or inconsistent feel warrants investigation.

Where to look: EPS column motor and control unit

Parts involved: Steering rack.

Ask the seller

  • “Has the electric power steering column motor been inspected or repaired?”
Body, brakes, suspension & interior6

02Electric Power Steering Rack Seal and Fluid Leak

For hydraulic systems: inspect the steering rack boots for power steering fluid contamination and the reservoir for low fluid level.2005–2018Suspension
CommonSuspension $800–$2,800 to fix

Premacy CR models fitted with hydraulic-assist power steering develop weeping and then active leaks at the inner rack seals and the high-pressure hose banjo fittings. The rack pinion seal fails due to age hardening of the rubber compounds, and the power steering fluid contaminates the subframe and surrounding chassis. CW models with electric power steering (EPS) develop a different failure: the motor control unit overheats or develops solder joint failures, triggering a loss-of-assist condition. Both variants generate a dashboard EPS or PS warning lamp.

Symptoms to notice

  • Power steering fluid seeping from the steering rack area, leaving oily residue on the subframe and inner guards
  • EPS or PS warning light illuminating on the instrument cluster, accompanied by heavy or intermittently absent steering assist

What to check

For hydraulic systems: inspect the steering rack boots for power steering fluid contamination and the reservoir for low fluid level. Check the high-pressure hose from the pump to the rack for seepage at the banjo fittings. If a workshop inspection is possible: For EPS-equipped CW models: scan for EPS fault codes with an OBD-II reader, and perform a low-speed parking manoeuvre to verify full unassisted-weight steering effort is not required.

Where to look: Steering rack mounted transversely across front subframe; EPS control module under instrument panel

Parts involved: Steering rack.

Ask the seller

  • “Is there any power steering fluid visible on the subframe or drips under the front of the car?”
  • “Has the EPS or PS warning light ever appeared on the dashboard?”
  • “Does the steering feel consistently light and assisted, or does it sometimes feel heavier?”

03Power sliding door cable fraying and roller failure

Cycle the sliding door three to four times using the power button and manually.petrol1999–2010Body & Rust
CommonBody & Rust $400–$900 to fix

The CP and CW Premacy sliding door operates via a cable-and-roller mechanism that stretches, frays and derails with age and use. The door may hesitate, reverse before latching, slam shut on a slope or trigger a continuous power-door warning light. Upper and lower track rollers corrode on older NZ examples, binding the door and accelerating cable wear. The failure mode ranges from inconvenient to a safety hazard if the door cannot be secured.

Symptoms to notice

  • Sliding door hesitates, reverses mid-travel or fails to latch
  • Power door warning lamp illuminated on instrument cluster
  • Door travel is jerky or makes grinding noise in track
  • Door rolls shut under gravity on a slope

What to check

  1. Cycle the sliding door three to four times using the power button and manually.
  2. Confirm the door moves smoothly across full travel and latches securely.
  3. Inspect the three rollers (upper, lower, and centre) for corrosion or worn nylon.
  4. Examine the cable at the drum for fraying.
  5. Note whether lubricating the track resolves sticking.

Where to look: Rear nearside sliding door, track along B and C pillars, cable drum behind interior trim

Ask the seller

  • “Does the sliding door open and close fully and latch properly every time?”
  • “Has the door cable or rollers ever been replaced or serviced?”
  • “Is the power door warning light currently on?”

04Front Lower Control Arm Ball Joint Wear

With the front wheels off the ground, grasp the tyre at 6 and 12 o'clock and attempt to rock it; vertical play indicates ball joint wear.2005–2018Suspension
CommonSuspension $350–$750 to fix

The front lower control arms on the Premacy CR and CW use pressed-in ball joints that wear in the socket and boot. The rubber boot splits — accelerated by NZ road grit — allowing water and debris ingress that corrodes the ball stud. Advanced wear produces handling vagueness and a clunking noise over bumps. Worn ball joints are a direct WOF failure item. Replacement requires either pressing in a new ball joint or replacing the entire lower arm assembly; New Zealand parts supply favours arm assembly replacement.

The front wheel of a car splayed outward with the lower control arm hanging down after a ball joint separation.Example of the part — not this vehicle

A separated lower ball joint: the control arm has dropped and the wheel has splayed out under the guard.

Elfix · CC0 · Wikimedia Commons

Symptoms to notice

  • Clunking or knocking noise from the front suspension corners when traversing speed bumps, pot holes, or sharp directional changes
  • Vague or wandering steering feel with the vehicle tracking poorly in a straight line

What to check

With the front wheels off the ground, grasp the tyre at 6 and 12 o'clock and attempt to rock it; vertical play indicates ball joint wear. Inspect the ball joint rubber boot visually for cracking or grease leakage. On a road test, listen for clunking from the front corners over speed bumps and sharp pot holes. Check for uneven tyre wear that may indicate long-standing alignment effects from worn joints.

Where to look: Front suspension lower control arm, one per side

Parts involved: Ball joint.

Ask the seller

  • “Has the vehicle recently passed a WOF, and were any suspension items flagged?”
  • “Do you hear any clunking from the front suspension over bumps or when cornering?”
  • “When were the front lower control arms or ball joints last inspected or replaced?”

05Brake Caliper Guide Pin Seizure

Check for pulling under braking.1999–2018Brakes
CommonBrakes $150–$500 to fix

Front brake caliper guide pins seize from corrosion causing uneven pad wear.

Symptoms to notice

  • Vehicle pulling to one side under braking
  • One front disc hotter than the other after moderate use

What to check

  1. Check for pulling under braking.
  2. Feel for uneven wheel heat.
  3. Inspect guide pins.

Where to look: Front brake calipers

Parts involved: Brake disc and pads.

Ask the seller

  • “Has the brake caliper guide pin seizure been inspected or repaired?”

06Rear Brake Caliper Guide Pin Seizure

Rear caliper guide pins seize causing uneven brake wear and drag on one side.Brakes
CommonBrakes

Rear caliper guide pins seize causing uneven brake wear and drag on one side.

Symptoms to notice

  • Rear caliper guide pins seize causing uneven brake wear and drag on one side.
  • Confirm with pre-purchase inspection by a qualified mechanic

What to check

Rear caliper guide pins seize causing uneven brake wear and drag on one side.

Where to look: See description

Parts involved: Brake disc and pads.

07Rear Trailing Arm Bush Collapse

Inspect rear trailing arm bushes for cracking.1999–2018Suspension
CommonSuspension $300–$800 to fix

Rear trailing arm bushes harden and collapse causing rear knocking and imprecision.

Symptoms to notice

  • Knocking from rear suspension over rough surfaces
  • Imprecise rear handling feel

What to check

  1. Inspect rear trailing arm bushes for cracking.
  2. Push arm — any movement indicates collapsed bushes.

Where to look: Rear suspension trailing arm mounting points

Ask the seller

  • “Has the rear trailing arm bush collapse been inspected or repaired?”
Depends on the exact engine — 4 moreDocumented for a specific engine we could not confirm from what you picked. Check the engine code on the car.
Engine, transmission & cooling4

01LF-VD Timing Chain Guide and Tensioner Wear

Start the engine from cold and listen for a rattling or slapping noise from the front of the engine that should settle within 3–5 seconds.petrol2005–2018Engine
OccasionalEngine $900–$2,200 to fix

Can't confirm for this car

The LF-VD 2.0-litre engine uses a simplex timing chain with plastic guide rails and a hydraulic tensioner. At high mileage, typically above 150,000 km, the plastic guide material wears and cracks, and the tensioner piston loses sealing pressure — particularly if oil change intervals have been extended. The result is chain slap noise on cold start that can progress to chain skip and valve-to-piston contact if neglected. NZ-imported units frequently arrive with undisclosed mileage or unknown service histories, increasing the incidence.

The front of a dual overhead camshaft engine with the timing cover removed, exposing the timing chain and sprockets.Example of the part — not this vehicle

The front of a twin-cam engine with the timing cover off — chain, sprockets and guides.

Logansenf · CC BY-SA 4.0 · Wikimedia Commons

Symptoms to notice

  • Metallic rattling noise from the front of the engine on cold start, lasting more than a few seconds before quieting
  • Check engine light with camshaft-to-crankshaft timing correlation fault codes P0016 or P0017

What to check

  1. Start the engine from cold and listen for a rattling or slapping noise from the front of the engine that should settle within 3–5 seconds.
  2. A rattle persisting beyond 10 seconds is a red flag.
  3. Check engine oil condition and level; low or black oil accelerates guide wear.
  4. If possible, scan for camshaft position correlation fault codes (P0016, P0017).
  5. Request compression test results.

Where to look: Front of engine block, behind timing cover on left-hand side of vehicle

Parts involved: Timing chain.

Ask the seller

  • “Does the engine make any rattling or ticking noise when first started from cold?”
  • “What is the oil change history, and has the timing chain or tensioner ever been inspected?”
  • “Has a check engine light appeared, and were any camshaft timing codes stored?”

02L3-VE Timing Chain Tensioner Rattle

Cold-start from overnight cold and listen for rattle from engine front.petrol2005–2010Engine
CommonEngine $600–$1,800 to fix

Can't confirm for this car

The CR Premacy L3-VE 2.3 timing chain tensioner produces a metallic rattle on cold start from oil pressure lag. Persistent rattle beyond 10 seconds indicates worn tensioner or guides.

The front of a dual overhead camshaft engine with the timing cover removed, exposing the timing chain and sprockets.Example of the part — not this vehicle

The front of a twin-cam engine with the timing cover off — chain, sprockets and guides.

Logansenf · CC BY-SA 4.0 · Wikimedia Commons

Symptoms to notice

  • Metallic rattle from engine front on cold start
  • Rattle persisting beyond 10 seconds or at operating temperature

What to check

Cold-start from overnight cold and listen for rattle from engine front. Normal: clears in under 5 seconds.

Where to look: Front of engine, timing chain and tensioner

Parts involved: Timing chain.

Ask the seller

  • “Has the l3-ve timing chain tensioner rattle been inspected or repaired?”

03Thermostat Housing Coolant Leak

Inspect the thermostat housing and the area below it for coolant residue, white calcium deposits, or staining on the engine block.petrol2005–2018Cooling
CommonCooling $280–$700 to fix

Can't confirm for this car

The LF-VD engine's thermostat housing is a plastic-bodied unit bolted to the front of the cylinder head. The housing-to-head mating face O-ring hardens and shrinks with age and heat cycling, causing a coolant weep that progresses to an active drip. Additionally, the plastic housing body itself develops hairline cracks at the coolant outlet stub and at the mounting boss. This is a known age-related failure on high-mileage NZ imports. If left unrepaired, coolant loss can trigger overheating and cylinder head gasket damage.

An annotated photograph of an automotive engine thermostat identifying the wax capsule and both disc valves.Example of the part — not this vehicle

A double-valve engine thermostat, labelled: the wax capsule is what sticks.

Dougsim · CC BY-SA 3.0 · Wikimedia Commons

Symptoms to notice

  • Coolant puddle or dried coolant staining on the engine block below the thermostat housing, visible as white or rust-coloured residue
  • Coolant reservoir level dropping over weeks without any visible external leak, indicating a weeping seal

What to check

  1. Inspect the thermostat housing and the area below it for coolant residue, white calcium deposits, or staining on the engine block.
  2. Check the coolant reservoir level and condition.
  3. Squeeze the upper radiator hose with the engine cold to feel for system pressure that should not persist — a leaking system loses pressure overnight.
  4. Start the engine and watch the temperature gauge for slow warm-up that may indicate a thermostat stuck open alongside the housing leak.

Where to look: Front of cylinder head, driver's side of engine bay

Parts involved: Thermostat.

Ask the seller

  • “Is there any coolant staining or residue visible around the thermostat housing at the front of the engine?”
  • “How often does the coolant reservoir need topping up?”
  • “Has the engine ever overheated or run hotter than normal?”

04Automatic Transmission Torque Converter Shudder

Test drive at 80-100 km/h with very light throttle and feel for rhythmic vibration.1999–2010Transmission
CommonTransmission $400–$2,500 to fix

Can't confirm for this car

4-speed automatic torque converter develops lock-up clutch shudder under light throttle at highway cruise.

A cutaway automatic transmission torque converter showing the internal turbine and stator.Example of the part — not this vehicle

A torque converter, sectioned. The lock-up clutch inside is what shudders.

No machine-readable author provided. BerndB~commonswiki assumed (based on copyright claims). · CC BY-SA 3.0 · Wikimedia Commons

Symptoms to notice

  • Rhythmic vibration at highway speed under light throttle
  • Shudder clears under firm acceleration

What to check

Test drive at 80-100 km/h with very light throttle and feel for rhythmic vibration. ATF condition — brown fluid indicates degraded ATF.

Where to look: Automatic transmission and torque converter

Parts involved: Torque converter.

Ask the seller

  • “Has the automatic transmission torque converter shudder been inspected or repaired?”
Other Mazda Mazda5 engines and years1 documented issue that do not apply to the one you picked.
Engine, transmission & cooling1

01Timing belt failure — interference engine (FS-ZE / LF-VE)

Obtain timing belt records and confirm interval compliance: typically 100,000 km or 10 years for FS-ZE and LF-VE.petrol1999–2005Engine
CommonEngine $400–$650 to fix

Does not apply

The CP Premacy uses the FS-ZE 1.8 and the CW Premacy uses the LF-VE 2.0, both interference-design engines. Belt snap causes immediate valve-to-piston contact and engine write-off. NZ examples are predominantly JDM imports and arrive with Japanese service records that may not indicate interval clearly for local buyers. The belt is concealed behind covers, making visual inspection without partial disassembly impractical.

Symptoms to notice

  • No advance warning before catastrophic belt failure
  • Tensioner rattle or squealing may precede failure
  • Japanese-only service documentation making interval verification difficult

What to check

Obtain timing belt records and confirm interval compliance: typically 100,000 km or 10 years for FS-ZE and LF-VE. If records are in Japanese only, have a dealer or import specialist confirm. Inspect belt through cover for cracking or glazing. Budget for immediate replacement plus tensioner, idler and water pump if history is unverified.

Where to look: Front of engine, driver's side behind plastic timing cover

Parts involved: Timing belt.

Ask the seller

  • “Can you show the timing belt service record — in English or Japanese?”
  • “Have the tensioner, idler and water pump been replaced at the same service?”
  • “What mileage is on the car and when was the belt last done?”

What these repairs cost on other cars

Some of the Mazda Mazda5’s documented faults are repairs other models share. Each page lists the documented NZ cost for every model it affects.

Other Mazda models

Mazda Mazda5 buyer questions

Is the Mazda Mazda5 reliable?

Like any used car, it depends on the specific example and its service history. Across the 12 documented faults for the Mazda Mazda5, the recurring problem areas are engine, suspension, and transmission. A Mazda Mazda5 with a full service history and no signs of the issues listed on this page can be a sound buy but each one needs to be checked individually before you commit.

What are the most common problems with a used Mazda Mazda5?

We've catalogued 12 known faults for the Mazda Mazda5, covering engine, suspension, and transmission. All 12 are written out in full on this page, with the symptoms to notice, what to inspect, and typical repair costs for each. Free to read, no account needed.

How much do repairs cost on a Mazda Mazda5?

Most single repairs on the Mazda Mazda5 fall between $400–$900 at NZ independent-workshop rates. Some of the 12 documented faults cost less and a few cost considerably more, and no one car needs them all. Knowing which ones to look for before you view is what lets you negotiate the price down or walk away.

Should I get a pre-purchase inspection on a Mazda Mazda5?

Yes. A Mazda Mazda5 inspection focused on its known weak points is the single best way to avoid an expensive mistake. KickTyres gives you a guided, model-specific inspection plus a market valuation and negotiation figure for $24.90 far less than the cost of missing one of the faults on this page.